A crochet beanie does not need a shaped crown worked in rounds. This everyday winter hat begins as a ribbed rectangle: crochet across its height, add rows until it fits around your head, then join the side and gather the top. A folded cuff gives extra fabric over the ears. The blue version keeps the surface plain so the ribs, fit, and tidy finishing do the work.
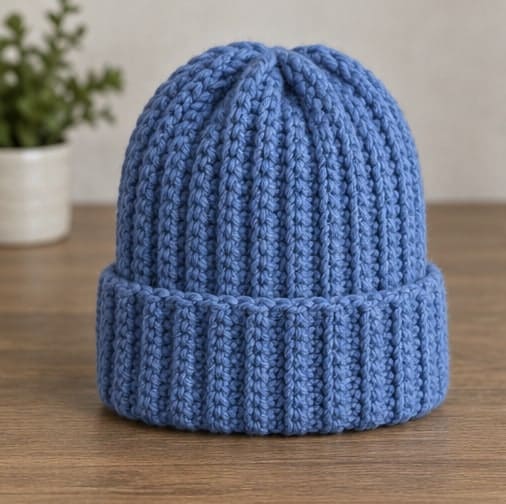
These instructions use US crochet terms. At the target gauge, the rectangle measures approximately 10 inches tall and 20 inches around before assembly. Folding up a 2-inch cuff leaves a nominal 8-inch depth, although gathering the crown changes the usable space slightly. The sample is intended for an adult head around 22 inches; check the actual wearer and the yarn's recovery before making the final seam. If you want a simpler open-top alternative to a gathered hat, try the crochet ear warmer.
Project at a Glance
| Detail | Pattern information |
|---|---|
| Skill level | Beginner comfortable with single crochet and simple sewing |
| Terms | US crochet terminology |
| Construction | Flat rectangle, side seam, gathered crown |
| Yarn | Smooth worsted-weight yarn with elastic recovery |
| Hook | 5 mm starting point; adjust after swatching |
| Main stitch | Single crochet in the back loop only |
| Target gauge | 16 stitches and 20 rows per 4 inches, washed and relaxed |
| Rectangle | 40 stitches by approximately 100 rows; 10 by 20 inches |
| Cuff | Fold up approximately 2 inches |
| Fit | Starting size for an approximately 22-inch adult head |
| Yarn estimate | 170–230 yards, including allowance for a swatch |
| Finishing | Sew side seam and securely gather the crown; no pompom |
Materials and Gauge
Choose a yarn that feels comfortable against the forehead and springs back after being stretched. A smooth wool blend makes the stitch tops easier to see than a fuzzy novelty yarn. A soft non-wool alternative is also possible, but test its recovery instead of assuming it will hold the same fit. A hat that stays stretched after handling needs a different fabric or sizing approach. For help comparing fibers and reading yarn labels, see the guide to choosing yarn for beginner crochet; use the weight and gauge specified for this project.
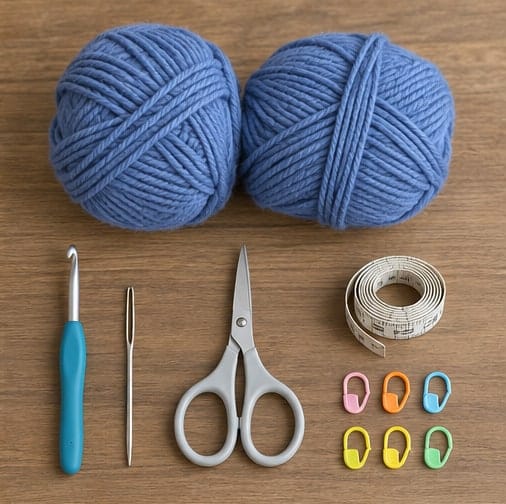
Gather yarn, a 5 mm crochet hook, a blunt tapestry needle, scissors, flexible tape, and several removable stitch markers. Keep the yarn label for washing instructions. The yardage is a planning estimate rather than a measured guarantee: fiber, tension, cuff depth, and changes to the hat all affect consumption. Have matching yarn available before starting if you want a solid-color finish.
For the swatch, chain 25 and work 24 single crochets across the first row. Chain one and turn for each later row, working in back loops only. Make at least 28 rows, wash according to the label, and let the fabric dry fully. Measure a central 4-inch area without stretching the ribs. The target is 16 stitches and 20 rows across that area.
If you have more than 16 stitches in 4 inches, try a larger hook; if fewer, try a smaller hook. Repeat the swatch after a change. Do not force row gauge by pulling on the fabric. You can adjust the number of rows to reach the required circumference, provided you measure the relaxed fabric and still get comfortable stretch.
Abbreviations and Construction Notes
- Ch: chain.
- Sc: single crochet.
- BLO: back loop only, the loop farther from you at the top of the stitch in the current row.
- St / sts: stitch / stitches.
- Turning chain: chain one before turning; it does not count as a stitch.
Each sample row has 40 sc. The starting stitch count sets the height from the lower edge to the crown. The number of rows sets the distance around the head. This direction matters when adjusting the pattern: adding starting chains makes a deeper hat, whereas adding rows makes a wider hat. If you need a refresher on the core stitches used here, review basic crochet stitches for beginners before working through the project-specific counts.
Work the first row into the foundation chain, then use BLO for all later rows. There are no increases, decreases, or short rows in this version. The crown will therefore have small gathers, not the smooth shaping of a top-down hat. The images illustrate the construction; use the written counts and measurements rather than counting stitches in a photograph.
Measure the Wearer Before Starting
Measure around the head where the lower edge of the hat will sit, passing above the eyebrows and around the widest part at the back. Keep the tape comfortably close without pressing it into the skin. For a 22-inch head, a relaxed 20-inch rectangle gives about 9 percent negative ease. That is a starting point for stretchy fabric, not a universal rule for every yarn.
Also consider depth. The 10-inch starting height includes a 2-inch fold and space that will gather at the crown. If you normally prefer a shallow hat, compare with a comfortable existing beanie before choosing your chain length. A deep cuff and a slouchy top both need additional height; they cannot both be created by folding the same short rectangle differently.
At four stitches per inch, a 10-inch height requires 40 stitches. At five rows per inch, a 20-inch circumference requires about 100 rows. Recalculate with your own washed gauge if it differs. Write down the target dimensions and keep them with the project so a pause between sessions does not lead to a different stopping point.
Crochet the Foundation and First Rows
Chain 41 with relaxed, even tension. The chain should lie straight without being forced. If your foundation chains are much tighter than your normal stitches, make the chain with a slightly larger hook and return to your gauge hook for Row 1. Keep the same number of chains.
Row 1: Sc in the second chain from the hook and in every remaining chain: 40 sc. Mark the first and last stitch and count before turning. Working into the back bump of the chains can make a tidy edge, but choose a consistent method that you can identify clearly.
Row 2: Ch 1, turn. Sc in the BLO of the first stitch and every stitch across: 40 sc. Do not skip the first stitch and do not add a stitch into the turning chain at the far end. Move both markers to the new row.
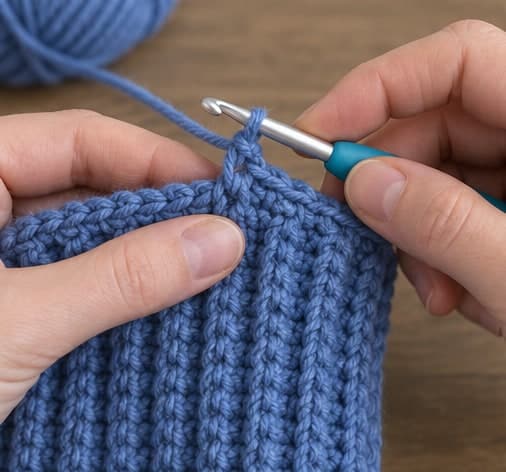
After several rows, check that the edges are parallel. Small curling near the foundation can settle, but a tight chain that noticeably shortens one edge should be corrected early. Pulling on a tight chain is not a reliable substitute for remaking it with suitable tension.
Build the Ribbed Rectangle
Rows 3–100: Repeat Row 2 for the sample, maintaining 40 sc in every row. Stop earlier or later if your measured circumference requires it. Count individual rows rather than assuming every visible ridge equals one row; a marker placed after each ten rows makes progress easier to track.
Measure the height after the first substantial section. Forty stitches should span approximately 10 inches at the stated gauge. If that is wrong, check the count and compare with your swatch. Continuing to add rows will not correct an incorrect height. Decide whether to restart or intentionally recalculate the fit before investing more yarn.
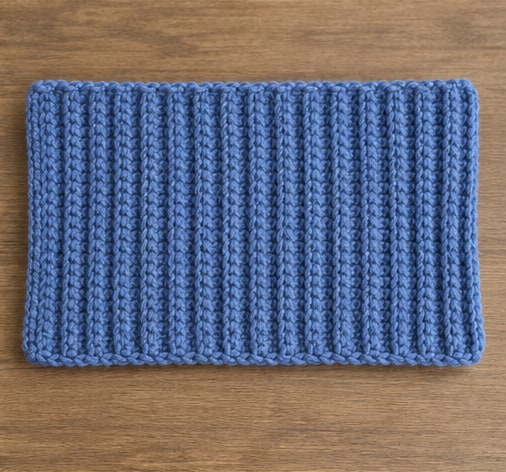
Near the target circumference, secure the working loop with a marker. If washing changes your swatch noticeably, wash and dry the rectangle before the final fit check, keeping the attached yarn ball dry and separate. Alternatively, fasten off and rejoin yarn later if needed. Measure only when fully dry and relaxed.
Temporarily clip the foundation edge to the last-row edge to form a tube. Fold the lower edge up approximately 2 inches and try it around the head. It should stay in position without uncomfortable pressure. Add rows if tight, remove rows if loose, and repeat the check. Do not use a tight seam to compensate for a rectangle that is too wide.
Sew the Side Seam
Leave a generous sewing tail, approximately 30 inches as a starting allowance. Bring the foundation edge and last-row edge together without twisting the rectangle. Match the 40 stitch positions along their length and clip the ends and midpoint together. The other two edges remain open: one becomes the crown and the other the lower edge.
Thread the tapestry needle and join the matched positions with a relaxed whipstitch. Catch secure corresponding loops along the foundation and the final-row stitches. Work across all 40 pairs. Pause regularly to spread the seam gently and check that it has not shortened the height or formed a hard ridge.
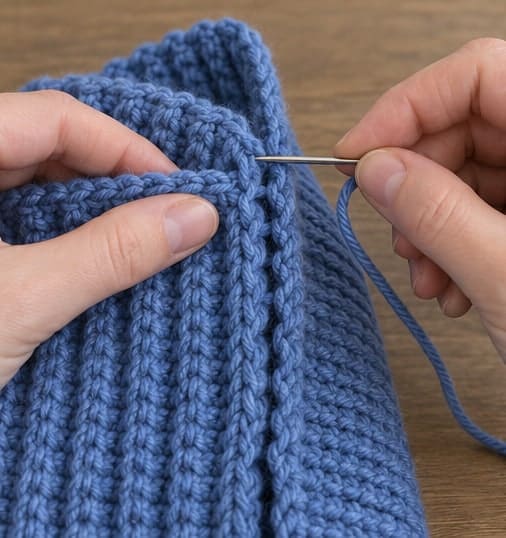
The cuff folds back over the outside of the hat, so any bulky seam at the lower edge can show. Keep the join narrow and place it at the back when wearing. If the seam feels stiff against the forehead, undo and resew with less tension rather than hiding the discomfort under a deeper fold.
Gather and Secure the Crown
Choose the upper open edge, opposite the cuff. With a separate length of matching yarn, run a gathering thread through a secure edge loop at each row end around that opening. There are approximately 100 row ends for the sample. Keep the needle passes near the edge and distribute them evenly rather than collecting a few large sections.
Pull gradually while spreading the gathers around the circle. Hold close to the fabric so you do not put all the strain on a long exposed yarn strand. If the yarn breaks easily under tension, use a stronger matching strand suitable for sewing and test it first. Do not yank hard enough to snap the yarn or tear the edge loops.
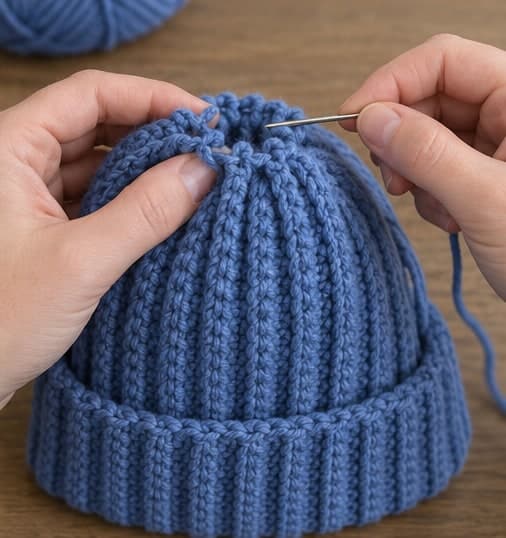
Once the opening is small, pass the needle across the remaining gap in several directions, catching sturdy fabric on opposite sides. Close the hole without creating a hard central knot. Secure the yarn on the inside and weave the tail through more than one direction. The closure should stay shut when the hat is gently stretched during a try-on.
Fold the Cuff and Check the Fit
Turn the hat right side out and fold the lower edge up about 2 inches, measuring at several points so the fold stays level. Position the side seam at the back. The cuff should cover the ears comfortably without pushing the hat upward. A little gathered fullness at the top is part of this construction.
Before trimming the final tails, wear the hat for a few minutes. If the crown pulls tightly upward, the hat may need more height rather than more circumference. If it falls over the eyes, try a slightly deeper fold, provided the ears still remain covered. A major sizing error is best corrected in the rectangle, not disguised with an uncomfortable cuff.
Color and Size Adjustments
For a different height, multiply your desired unfolded height by your stitch gauge per inch, round to a whole stitch, and chain one more than that count. Keep the resulting stitch count in every row. For a different circumference, adjust only the row count, then test before seaming. Changes to either measurement affect yardage.
Color changes between rows create vertical stripes on the finished hat. Complete the last yarn-over of the final stitch with the next color, then chain one and turn. Weave the tails into their matching areas without restricting stretch. Avoid bulky knots at the crown, where the gathered fabric already creates extra thickness. Complete the outfit with crochet fingerless gloves, using their own measurements to fit the intended wearer.
Troubleshooting
The crown has a small hole after wearing
The gathering yarn may have loosened or the final securing passes may not catch strong fabric. Inspect the closure from the inside. Add a new matching strand through sound edge loops, draw it closed gently, and secure across the opening before weaving in the tail. Do not rely on a decorative pompom to hide an unsecured hole.
One side of the cuff is taller
First unfold the cuff and compare the rectangle's lower edge with its seam. If the fabric is even, refold and measure around the hat. If the seam has gathered one side, loosen and resew it. If the original stitch count changed, locate the affected rows; folding alone will not make an uneven rectangle square.
The hat becomes loose after a short wear
Check the yarn's recovery and whether the rectangle was measured stretched. Wash and dry according to the label, then reassess. If the fabric recovers but the circumference is still too large, undo the crown and side seam, remove rows, and refit. Yarn that stays stretched may need replacing with a more resilient choice.
Quick Project Plan
| Step | What to check |
|---|---|
| Prepare yarn and tools | Wash a ribbed swatch and measure the intended wearer |
| Follow, count, and check | Maintain 40 sample stitches and test circumference before seaming |
| Finish and review | Sew a flexible side seam, close the crown, and level the cuff |
Frequently Asked Questions
Is this hat worked from the brim upward?
No. Each row runs from the lower edge toward the crown or back again. Rows accumulate around the circumference, so the flat rectangle is joined along its foundation and last-row edges. This is why the starting chain controls height rather than head size.
Can I leave the cuff unfolded?
Yes, but the same rectangle will create a deeper, slouchier hat. For a close-fitting version without a cuff, choose a shorter unfolded height and calculate a new starting stitch count. Do not remove rows to shorten the hat; that changes its circumference instead.
Why does the top look gathered rather than smoothly rounded?
A rectangle has the same height all the way around, so its upper edge must gather into the crown. Smooth crown shaping would require a different construction with decreases or short rows. Distribute the gathers evenly and keep the closure flexible for the neatest result within this design.
Should I sew the cuff in place?
It can remain adjustable. If it repeatedly unfolds, a few loose matching tacks through the folded layers can hold it, but test the fit first and avoid sewing a tight line all the way around. Fixed stitching can reduce the stretch that makes the brim comfortable.
Can I claim this exact size fits every adult?
No. Head measurements, hair, personal preference, and yarn elasticity differ. The 20-inch relaxed circumference is a starting size for an approximately 22-inch head. Measure and try on the temporary tube before closing the crown, especially when making a gift for someone with a different fit preference.
Final Thoughts
The most useful moment in this crochet beanie is the temporary tube fitting: it lets you correct circumference while the work is still easy to undo. Keep the sample at 40 stitches per row, aim for a relaxed 10-by-20-inch rectangle, then give the side seam and gathered crown the same attention as the crochet. A level cuff and a secure, comfortable closure turn that simple rectangle into an everyday winter hat.
Keep color combinations for your next hat on Crochet by Season's Pinterest page. If you try a different cuff depth or yarn, share what changed on our Facebook page; those fit notes are worth keeping with the pattern for the next wearer.