A crochet ear warmer keeps your ears covered without flattening your hairstyle under a full hat. This version starts as a narrow rectangle worked in back-loop single crochet. Once the strip fits comfortably around your head, you join its short ends with a simple seam. There is no shaped crown, twisted join, or button fastening to manage, so you can concentrate on even edges and a flexible fabric.
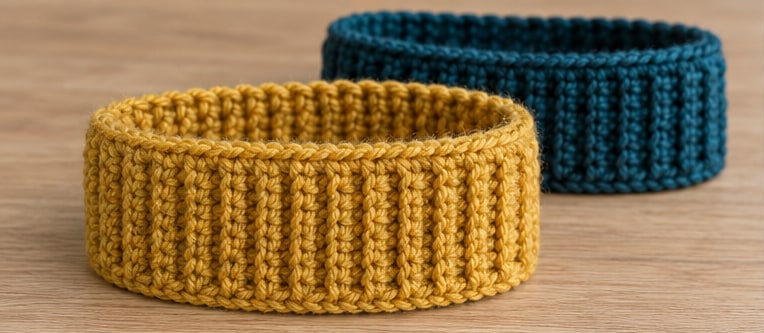
The instructions use US crochet terms. The adult sample is designed to finish approximately 4 inches wide and 20 inches around, with enough stretch for a head measuring about 22 inches. Those dimensions depend on your washed gauge and yarn recovery. Measure the intended wearer and test the fabric before deciding where to stop; a comfortable fit matters more than reaching a particular row number. Pair this band with crochet fingerless gloves for a coordinated set that uses the same back-loop single crochet technique.
Project at a Glance
| Detail | Pattern information |
|---|---|
| Skill level | Beginner familiar with single crochet and turning rows |
| Terms | US crochet terminology |
| Construction | Flat rectangle joined across its short ends |
| Yarn | Smooth worsted-weight wool/acrylic blend with good recovery |
| Hook | 5 mm as a starting point; adjust to achieve gauge |
| Main stitch | Single crochet in the back loop only |
| Target gauge | 16 stitches and 20 rows per 4 inches, washed and relaxed |
| Sample dimensions | Approximately 4 inches wide and 20 inches around |
| Intended sample fit | Approximately 22-inch head, subject to a stretch test |
| Estimated yarn | 60–90 yards; allow extra for swatching and adjustments |
| Finishing | Flexible whipstitch seam, no overlap and no twist |
Materials and Gauge
Choose yarn that feels comfortable against your forehead and ears. A smooth wool/acrylic blend is a useful starting choice because you can see the stitches and assess how the fabric springs back. If wool irritates your skin, use a soft alternative and check its stretch rather than assuming it will behave the same way. Avoid stiff yarn for this particular fitted design. For help comparing fibers and reading yarn labels, see the guide to choosing yarn for beginner crochet; use the weight and gauge specified for this project.
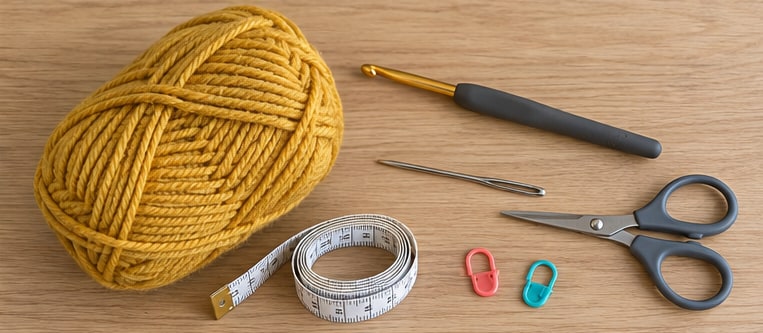
Gather a 5 mm hook, blunt tapestry needle, scissors, flexible measuring tape, and two removable stitch markers. The hook size is a starting point, not a requirement. Keep the yarn label so you can follow its washing instructions and record the fiber content if the band will be a gift. The yardage is an estimate, not a measured guarantee for every yarn.
Make a swatch before the ear warmer. Chain 25, work 24 single crochets in the first row, then continue with back-loop single crochet for at least 26 rows. Chain one and turn between rows. Wash and dry the swatch according to the label. Lay it flat without pinning it into a stretched shape, then count stitches and rows across a central 4-inch area, away from the edges.
The target is 16 stitches and 20 rows per 4 inches. If you count more stitches, try a larger hook; if you count fewer, try a smaller one. Make another swatch after changing hooks. Row gauge determines the length of the strip, so you can also adapt the number of rows rather than forcing your tension to match both measurements exactly.
Stretch the dry swatch gently in the direction in which the rows accumulate, then release it. It should recover reasonably well. Fabric that stays stretched will produce a band that loosens during wear. Do not compensate for poor recovery by making an uncomfortably tight ear warmer; choose a different yarn or firmer fabric instead.
Abbreviations and Construction Notes
- Ch: chain.
- Sc: single crochet.
- BLO: back loop only, the loop farther from you when you view the top of the stitch in the current row.
- St / sts: stitch / stitches.
- Turning chain: the chain one used before turning; it does not count as a stitch.
Each row contains 16 stitches in the sample. The foundation chain sets the width across your ears; the number of rows sets the circumference around your head. Work the first row into the foundation chains, then work every subsequent row through back loops only. There are no increases or decreases. Mark the first and last stitch until you can identify them easily. If you need a refresher on the core stitches used here, review basic crochet stitches for beginners before working through the project-specific counts.
This is a plain band, not a twisted-front headband. Keep the short edges aligned without rotating either end when you seam. The photographs illustrate the construction and overall appearance; use the written counts and your own measurements when checking individual stitches.
Measure Your Head and Choose the Length
Wrap a flexible tape around the path where the band will sit, covering the ears and passing around the back of the head. Keep it level and comfortably close to the skin. Measure over your usual hairstyle if you plan to wear the band with your hair up or under a hood.
For a 22-inch head, a 20-inch finished band gives roughly 9 percent negative ease: it is smaller than the head and stretches into place. This is a starting point for elastic fabric, not a universal sizing rule. Temporarily join the ends and try the band on before committing to the seam. If it presses behind the ears or feels tight at the forehead, add rows.
At the stated row gauge, each inch contains five rows. A 20-inch strip therefore requires approximately 100 rows. For a different relaxed length, multiply the desired inches by your actual rows per inch. Round to a whole row, then check the result on the wearer. The edge-to-edge seam does not require a large seam allowance because the ends are not overlapped.
Start the Foundation and First Row
Chain 17 loosely enough that the chain can lie straight without pulling into a curve. If your chains are consistently tighter than your stitches, try a slightly larger hook for the chain only, then return to the hook that produced your gauge. Do not add extra chains unless you intend to change the finished width.
Row 1: Work one sc in the second chain from the hook and one sc in each remaining chain. You should have 16 sc. Count before continuing, and place a marker in the first and last stitch. Choose one consistent part of each foundation chain to work into; working into the back bump gives a tidy foundation edge if you can identify it comfortably.
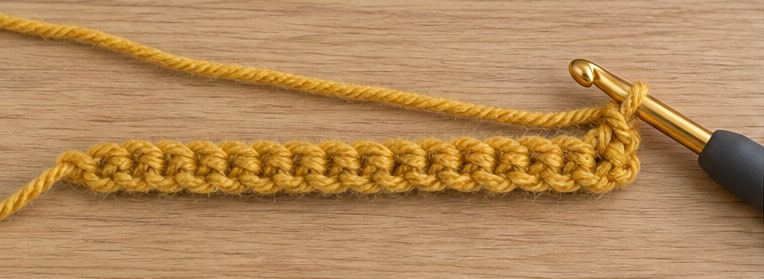
Lay the small strip down and check that you have not skipped a chain. A little curl at this early stage can settle as more rows are added, but a severely tight foundation is worth correcting now. Pulling hard on the strip will not permanently repair an overly tight chain.
Work the Ribbed Rectangle
Row 2: Ch 1, turn. Sc in the BLO of the first stitch and every remaining stitch across: 16 sc. Do not skip the first stitch, and do not work into the turning chain at the far edge. Move the markers into the new first and last stitches.
Rows 3–100: Repeat Row 2 for the sample, or stop when the washed, relaxed strip reaches your chosen length. Every row still has 16 sc. Write down the row number after each small group of rows so you can check your progress without counting the entire strip repeatedly.
At the target gauge, 16 stitches create a width of approximately 4 inches. Measure the width after several rows. If it differs substantially, check your stitch count and gauge before adding more length. Keep the loop on the hook relaxed as you turn; pulling it tight can make the side edges draw inward.
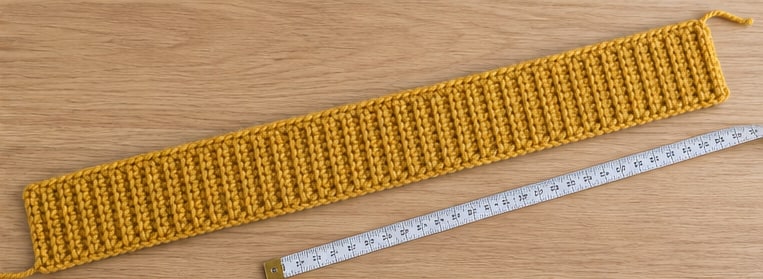
Before fastening off, compare the strip with your swatch and intended fit. If the finished fabric needs washing to reach its relaxed dimensions, secure the working loop with a marker and wash the strip according to the yarn label. Let it dry fully, then measure without stretching. Keep the attached yarn ball dry and separate while doing this, or fasten off and rejoin yarn if extra rows are needed.
Join the Short Ends Without a Twist
Leave about a 20-inch yarn tail for sewing. Place the rectangle flat and bring its two short ends together to form a loop. Follow one long edge around the loop with your finger: it should return to the starting point without changing sides. If it does not, straighten the band before sewing.
Match the 16 stitches at one short edge to the corresponding 16 positions at the other. Clip the corners together with removable markers. Thread the tapestry needle and whipstitch the matching edge positions together, catching both loops of the final-row stitches and secure corresponding loops along the foundation edge. Work across all 16 pairs rather than skipping every other stitch.
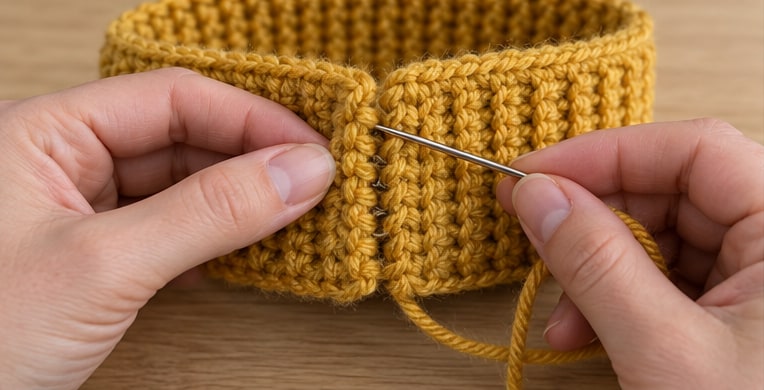
Draw each stitch snug enough to close the gap but not so tight that the join puckers. After several stitches, gently spread the fabric and check that the seam remains flexible. If it forms a hard ridge, loosen the sewing tension. Keep the ends butted together rather than stacking a wide overlap, which would create unnecessary bulk against the head.
Try on the band before weaving in the final tail. A seam that feels uncomfortable is easier to undo now. When satisfied, weave the tail through the fabric on the inside in more than one direction without cinching the stitches. Trim only after gently stretching the band and confirming that the end stays secure.
Check the Finished Fit
Place the seam at the back of your head and position the lower edge over the ears. Wear the band for several minutes. It should stay in place while you turn your head, without leaving uncomfortable pressure at your temples. Check both with your hair up and with your normal winter outerwear if those change how it sits.
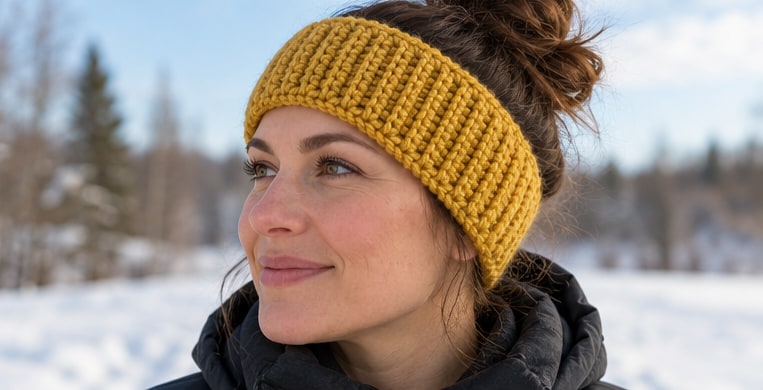
If it feels too tight, undo the seam, add rows, and join again. If it slips, remove a few rows and repeat the fit check. Change the length gradually: at the sample gauge, five rows equal approximately one inch. Removing a large section at once can turn a slightly loose band into an uncomfortable one.
Customize the Width and Color
For a narrower or wider band, change the starting stitch count using your stitch gauge. At four stitches per inch, 14 stitches give about 3½ inches and 18 stitches give about 4½ inches. Chain one more than the desired stitch count, then maintain that count in every row. A wider band will use more yarn and may fit differently around the back of the head.
Use one color for a clean ribbed texture, or change colors between complete rows for stripes. Complete the last yarn-over of the final stitch with the new color, then chain one and turn. Leave tails long enough to weave securely into their matching colors. Avoid bulky knots at the edge that will rest against your skin. For a different colorwork project to wear with the band, try a crochet checkered scarf.
Troubleshooting
My edges keep getting wider
Count the stitches in the last correct row and the first wider row. An extra stitch often comes from working into the turning chain. Undo the affected rows and restore the original count, then mark both end stitches. Adding a decrease later would disguise the count problem but leave a visibly uneven edge.
The band looks ribbed but feels stiff
Check whether you are pulling each stitch tightly or using a hook that makes the fabric too dense. Compare with the washed swatch. A larger hook may improve flexibility, but it also changes width and length, so recalculate the stitch and row counts before restarting.
The seam is tighter than the rest of the band
The sewing yarn may be pulled too firmly. Undo the seam and reconnect the same edges with relaxed stitches, checking stretch as you go. Adding more crochet rows will not fix a seam that has been drawn into a rigid line.
Quick Project Plan
| Step | What to check |
|---|---|
| Prepare yarn and tools | Wash a swatch, check recovery, and measure the wearer |
| Follow, count, and check | Keep 16 stitches in every sample row and measure the strip |
| Finish and review | Seam without a twist, test the fit, then weave in tails |
Frequently Asked Questions
Can I use cotton for this ear warmer?
You can try it, but do not assume the same negative ease will work. Cotton often has less elastic recovery than a wool blend, and different cotton constructions behave differently. Make and wash a swatch, stretch it, and test the band on the wearer. Choose another yarn if it stays loose after stretching.
Must I stop at exactly 100 rows?
No. That count produces about 20 inches only at five rows per inch. Your washed row gauge and the intended head measurement determine the stopping point. Keep the stitch count constant while adjusting the number of rows.
How do I make the seam less noticeable?
Use matching yarn, pair the edges carefully, and avoid pulling the stitches into a ridge. Position the seam at the back when wearing the band. This is a sewn join and may remain visible on close inspection; an invisible finish is not required for a comfortable result.
Can I substitute half double crochet?
Not without recalculating. Half double crochet changes the row height, fabric density, stretch, and likely yardage. Make a new swatch and use its measurements to choose both your starting stitch count and finished row count. The 16-stitch, 100-row sample applies to this single-crochet version.
How should I wash and store the finished band?
Follow the yarn label. Reshape gently after washing and dry as directed without stretching it over a large object. Store it flat rather than hanging it by one edge. Recheck the fit after the first wash, especially if the yarn is new to you.
Final Thoughts
The useful checkpoint in this crochet ear warmer is the fit before the final seam: a neat rectangle alone cannot tell you whether the band will feel comfortable. For the sample, keep 16 stitches per row, aim for a washed 4-by-20-inch strip, and join the short ends without a twist. Adjust the length to your yarn and head measurement, then secure the tails only after the band sits comfortably over your ears.
Save your winter color ideas with Crochet by Season on Pinterest, or share the yarn and fit adjustments that worked for you on our Facebook page. A second band is a useful opportunity to try another color while keeping the measurements you have already checked.