A crochet mug cozy adds a soft band of color to an everyday cup without covering its handle or drinking rim. This version uses a plain single-crochet rectangle, a small chain loop, and one button. Work the band flat, fit it to the actual mug, and place the fastening beside the handle. The simple surface suits a winter desk gift and makes changes in stitch count easy to spot.
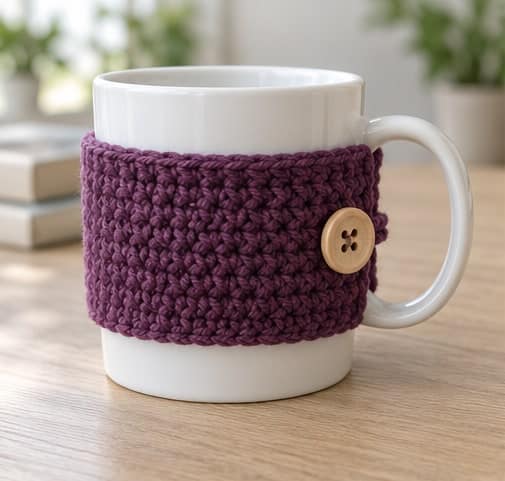
The pattern uses US crochet terms. The starting sample measures approximately 10 inches long and 2 inches tall at the stated gauge, before adding its fastening. It is designed as a starting point for a straight-sided mug measuring about 10½ inches around the covered area. Measure your own cup because the handle attachments, taper, and circumference determine whether this rectangle fits properly. A mug cozy can be part of a practical gift set; find more ideas in crochet gifts for coworkers.
Project at a Glance
| Detail | Pattern information |
|---|---|
| Skill level | Beginner familiar with single crochet and sewing on a button |
| Terms | US crochet terminology |
| Construction | Flat rectangle with one chain-loop fastening |
| Yarn | Smooth worsted-weight cotton |
| Hook | 4 mm starting point; adjust to achieve gauge |
| Main stitch | Single crochet through both loops |
| Target gauge | 18 stitches and 24 rows per 4 inches, washed and relaxed |
| Sample band | 45 stitches by 12 rows; approximately 10 by 2 inches |
| Closure | Adjustable chain loop and securely sewn button |
| Yarn estimate | 30–50 yards including a small swatch and finishing allowance |
| Important limitation | Decorative wrap, not a heatproof holder or burn-protection product |
Materials and Gauge
Smooth cotton is a useful choice for a washable mug accessory, but its performance depends on the actual yarn and washing method. Choose a firm yarn whose stitches stay distinct. Keep the label and use its care instructions when giving the cozy away. Avoid fluffy fibers that shed near the drinking rim and loose novelty strands that could catch on the handle. For help comparing fibers and reading yarn labels, see the guide to choosing yarn for beginner crochet; use the weight and gauge specified for this project.
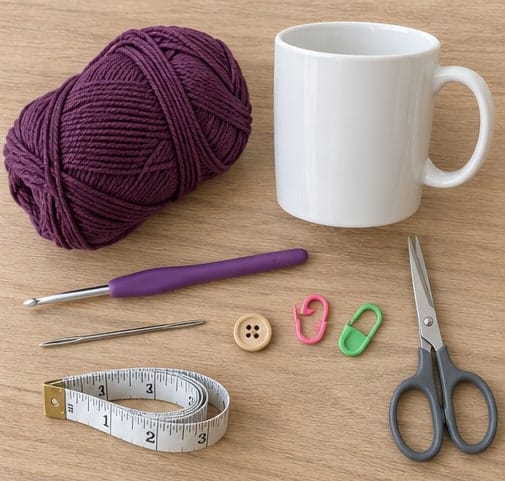
You will need yarn, a crochet hook, blunt tapestry needle, scissors, flexible measuring tape, two removable markers, and the intended mug. For the closure, choose a smooth button approximately ⅝–¾ inch across as a starting option, with holes suitable for secure sewing. A separate sewing needle and strong matching thread can be useful when the yarn will not pass through the button holes.
Make a swatch large enough to measure away from its edges. Chain 25, work 24 sc in the first row, and continue until the piece is at least 4½ inches tall. Chain one and turn between rows. Wash and dry according to the label, then measure a central area without stretching it. The target is 18 stitches and 24 rows in 4 inches.
A smaller hook usually creates more stitches per inch; a larger hook usually creates fewer. Try another swatch after changing hooks. The band should bend around the mug without looking loose or lacy. Gauge affects both the number of stitches needed around the cup and the number of rows that fit between its handle attachments.
Abbreviations and Notes
- Ch: chain.
- Sc: single crochet.
- Sl st: slip stitch.
- St / sts: stitch / stitches.
- Turning chain: chain one before turning; it does not count as a stitch.
Work all ordinary rows through both top loops of each stitch. The starting chain runs around the mug, so the stitch count controls the band's length. Rows build its height. Keep those directions separate when resizing: adding rows will not make the band reach farther around the cup. If you need a refresher on the core stitches used here, review basic crochet stitches for beginners before working through the project-specific counts.
This cozy has no crocheted base and must not be used to lift the mug. Keep the normal handle available and leave space below the drinking rim. The photographs illustrate the design and assembly; judge the fit using the written instructions, your measurements, and the actual cup rather than by counting photographed stitches.
Measure the Mug and Plan the Handle Gap
Use an empty, cool mug for every fitting step. Wrap the tape around the middle where the cozy will sit. On a tapered cup, measure at both the upper and lower edge of the intended band. A substantial difference means a plain rectangle may slide or buckle. Select a straighter mug for this beginner version instead of forcing a tight closure to hold an unsuitable shape.
Check the vertical space available between the handle attachments and below the rim. The 2-inch sample height is only suitable when that space can accommodate it. Leave the rim unobstructed and keep the lower edge above the point where the mug sits on the table. A cozy that catches under the base can make the cup less stable.
For the example mug, a 10½-inch circumference and a 10-inch band leave approximately a ½-inch gap beside the handle. The loop bridges that area and reaches a button set slightly inward from the opposite end. Because buttons and handle shapes differ, test the actual loop length instead of treating the gap measurement as its exact chain length.
At 4½ stitches per inch, a 10-inch band needs 45 stitches. If your measured band length is different, multiply it by your washed stitch gauge per inch and round to a whole stitch. Add one chain for the foundation. Aim for a neat fit without pulling the rectangle hard enough to distort its edges.
Start the Long Foundation
Chain 46 for the sample. Keep the chain relaxed so it can lie flat. If your chains are much tighter than your single crochet, try making only the chain with a slightly larger hook, then return to the hook used for your gauge swatch. Do not add extra chains to compensate for tension unless you are intentionally changing the length.
Row 1: Sc in the second chain from the hook and in every remaining chain: 45 sc. Count the stitches and mark both ends before continuing. Choose one consistent part of each chain to work into; the back bump is an option if you can identify it comfortably.
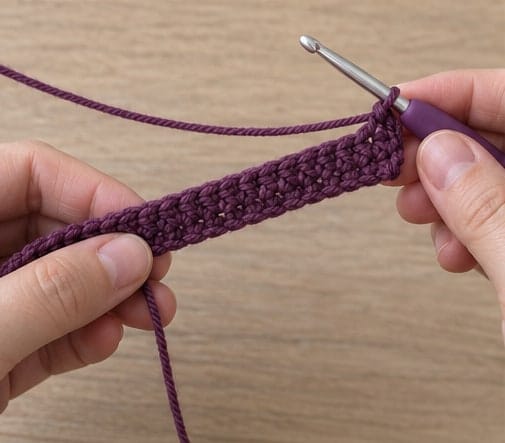
Row 2: Ch 1, turn. Sc in the first stitch and every stitch across, working through both loops: 45 sc. Do not work into the turning chain. Move the markers into the new first and last stitch so neither edge gains an accidental extra stitch.
Complete the Rectangle
Rows 3–12: Repeat Row 2, maintaining 45 sc in each row. At the target gauge, 12 rows measure approximately 2 inches. Stop at the height that fits your mug, even if your row gauge requires a different total. The upper and lower edges must remain clear of the drinking rim and base.
Lay the band flat and compare its ends. If the rectangle widens or narrows, count the stitches before fastening off. Correct the affected rows rather than trying to hide the problem with the button. A straight band wraps more evenly and leaves a consistent opening beside the handle.
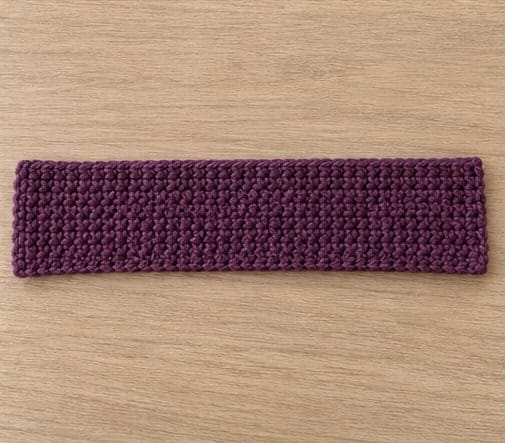
Wash and dry the band as you did the swatch if its dimensions change after laundering. Wrap the relaxed rectangle around the cool mug and bring its short ends toward the handle. Check that it sits flat without stretching severely, overlapping unexpectedly, or catching beneath the cup. Make any length or height correction before adding the closure.
Add the Chain Loop
Find the center of one short edge. On the 12-row sample, this falls between the ends of Rows 6 and 7. Join yarn securely at that midpoint. Start by chaining 10, then slip stitch back into the same edge area to form a loop. Keep the loop base secure without pulling the short edge into a pucker.
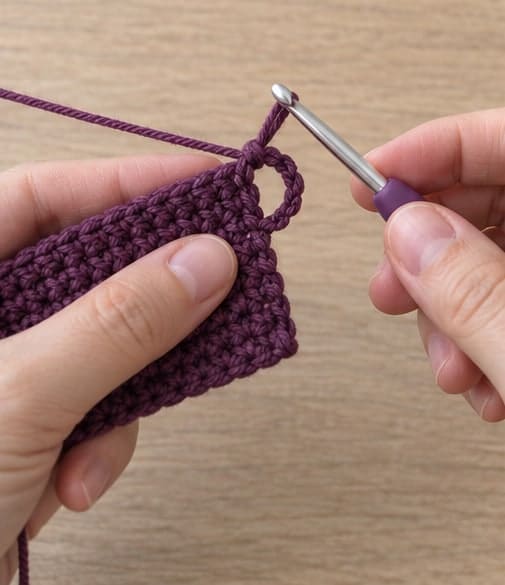
Treat 10 chains as a fitting trial, not a fixed answer. Bring the loop through the handle opening, clear of the area where you hold the mug, and stretch it gently toward the planned button position on the other short end. It should pass over the button with mild resistance and rest around it without holding the band under excessive tension.
If the loop cannot reach, undo it and add chains; if it is slack, remove chains. Test with the actual button before fastening off. The finished loop should not hang loosely or slip off during normal handling. Secure its tails through the band in more than one direction, avoiding a bulky knot against the cup.
Sew the Button and Test the Closure
Place the button near the vertical center of the opposite short end, roughly ½ inch inward as an initial position. Pin or hold it temporarily while the band is fitted to the mug. Adjust the position so the loop closes comfortably and the gap remains near the handle. Do not sew first and hope the loop will compensate for an unsuitable placement.
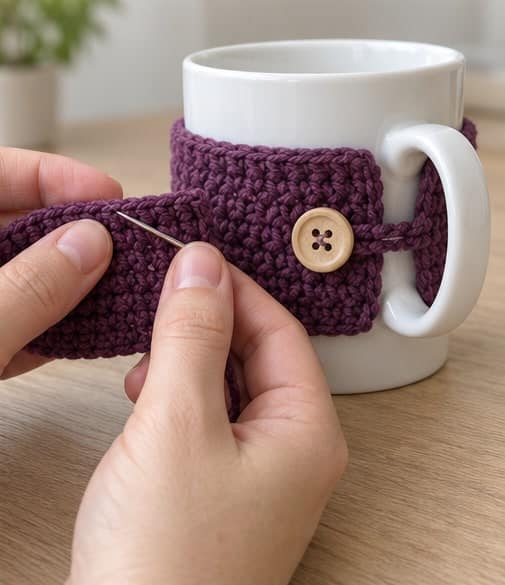
Sew through the button holes and several secure stitches in the band, using repeated passes. If using thread, avoid tightening it until it cuts into the cotton. Leave enough room beneath the button for the crochet loop, but no long loose thread shank. Fasten securely on the inside and weave in the end.
Remove and refasten the cozy several times on the empty mug. Check that the button remains firm, the loop does not catch your fingers, and the band does not shift upward toward the rim. A button is a small detachable part, so keep this accessory away from children who may put it in their mouth. Inspect the fastening regularly, especially after washing.
Use and Care
This is a decorative mug wrap, not a tested insulation device. Do not assume it makes a hot cup safe to grip. Use the mug's handle and follow the mug manufacturer's instructions. Remove the cozy before microwaving, putting the mug in a dishwasher, or exposing it to a heat source. Decorative buttons may have care limitations independent of the yarn.
Remove a wet cozy and let it dry before using it again. Damp fabric can slip or remain against the cup, and stains are easier to address when the wrap is separate. Follow the yarn and button care instructions, reshape the rectangle without stretching it, and dry fully before checking the fit again.
Customize the Winter Gift
Use a solid plum, blue, or evergreen shade for a simple textured band. Stripes can be made by changing yarn between complete rows; the stripes will run horizontally around the mug. Complete the last yarn-over of the preceding row with the next color, then chain one and turn. Weave tails carefully so they do not create ridges beneath the band.
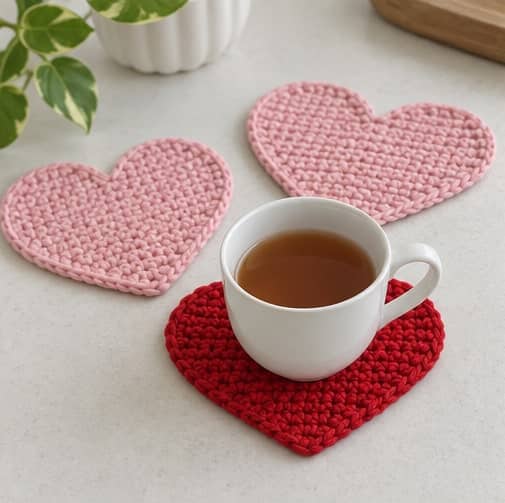
For a gift, fit the cozy to the mug you will give with it and include the fiber content and washing instructions. Do not label a fitted sample as universal size. The recipient should know that changing to a wider, narrower, or sharply tapered mug may require a different band or fastening. Add a separate table accessory with these crochet fall coasters, choosing colors that complement the cozy.
Troubleshooting
The wrap slides down the mug
Check whether the mug narrows toward its base or whether the band is too long. Test a straighter cup first. If the shape is suitable but the band is loose, shorten it by changing the foundation stitch count and remaking the rectangle. Over-tightening the button loop can distort the gap without fixing the underlying fit.
The upper edge curls toward the drink
The band may be too tall, positioned too high, or made with a tight foundation edge. Compare both long edges while it is off the mug. Correct uneven tension or reduce the height, and leave clear space below the rim. Do not simply fold the top edge over the drinking surface.
The button pulls through the crochet fabric
The sewing passes may be concentrated in one weak loop. Remove the button and resew through several firm stitches, keeping the tension even. A looser, open fabric may need a firmer gauge and a new rectangle. Inspect for damage before using the closure again.
Quick Project Plan
| Step | What to check |
|---|---|
| Prepare yarn and tools | Measure the cool mug and wash a cotton swatch |
| Follow, count, and check | Keep 45 sample stitches and fit the band's height |
| Finish and review | Adjust the loop, sew the button, and test rim and handle clearance |
Frequently Asked Questions
Can I use the cozy as a handle for a hot mug?
No. The crochet band, loop, and button are not designed to carry the weight of a filled cup or protect against burns. Keep the mug's normal handle free and use it. The wrap is an accessory rather than a replacement for safe handling.
Does every mug need the same 10-chain loop?
No. Button diameter, button position, yarn tension, and the handle opening all change the required length. Start with the trial loop, fit it on the empty mug, and adjust before securing the tail. It should close without either dangling or straining the rectangle.
How do I make a shorter cozy without changing its circumference?
Work fewer rows while keeping the starting stitch count the same. Rows control height in this pattern, whereas stitches along each row control length around the mug. Check that the shorter band still supports a centered fastening securely.
Is a crocheted base necessary?
Not for this design. The mug sits directly on the table, which lets you check its stability and avoids placing uneven yarn beneath it. Use a separate suitable coaster if the surface needs protection; do not add an improvised bulky bottom to this wrap.
Can I make a set before buying the mugs?
You can prepare swatches and choose colors, but final sizing is better done with the actual mugs. Two cups with similar capacities may have different circumferences and handle placements. Making the band and closure to the real cup reduces the chance of an unusable gift.
Final Thoughts
The finishing details matter more than a complicated stitch in this crochet mug cozy. Start with the 45-stitch, 12-row rectangle if it matches your measured cup, then use the cool-mug fitting to place the loop and button. A clear rim, open handle, and stable base are the final checks before wrapping the gift.
Save a few winter yarn combinations on Crochet by Season on Pinterest, or show your fitted mug-and-cozy pairing on our Facebook page. Keep the cup measurements with your notes so the next matching wrap is easier to size.