A crochet heart headband adds a small Valentine detail without becoming a bulky winter ear warmer. This version starts with a narrow blush-pink strip worked in single crochet through the back loop. Join the short ends with a straight seam, then sew three little raspberry hearts over one temple. The decoration stays localized so most of the band can still stretch comfortably around your head.
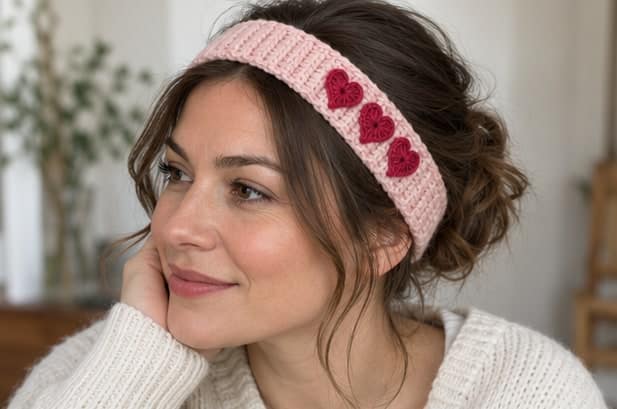
The instructions use US crochet terms and describe an adult accessory. At the target gauge, the undecorated band measures approximately 1.6 inches wide and 20 inches around before stretching. Treat those measurements as a starting point for a roughly 22-inch head, not a guaranteed fit: yarn recovery, hairstyle, and personal comfort matter more than reaching a particular row number. The photographs are generated illustrations of the construction; use the stitch counts and fit checks below when making your own version. For a wider band intended to cover the ears, compare the fit of this crochet ear warmer.
Project at a Glance
| Detail | Project specification |
|---|---|
| Skill level | Confident beginner; the heart introduces tall stitches |
| Crochet terms | US |
| Construction | Narrow flat strip, straight end seam, three sewn appliques |
| Band yarn | Soft DK yarn with stretch and recovery, such as a wool-acrylic blend |
| Band hook | Start with 4 mm and adjust to gauge |
| Main stitch | Single crochet in the back loop only |
| Target gauge | 20 stitches and 24 rows per 4 inches, relaxed after washing |
| Sample band | 8 stitches wide; 120 rows long |
| Finished size | Approximately 1.6 inches wide and 20 inches around, before stretching |
| Heart yarn | Fine sport-weight cotton or another smooth fine yarn |
| Heart hook | Start with 2.5 mm; adjust to keep the heart within the band width |
| Approximate yarn | 50–70 yards for the band, plus 5–10 yards for three hearts |
| Finishing | Flat seam and flexible sewing stitches; no elastic insert required |
Materials and Gauge
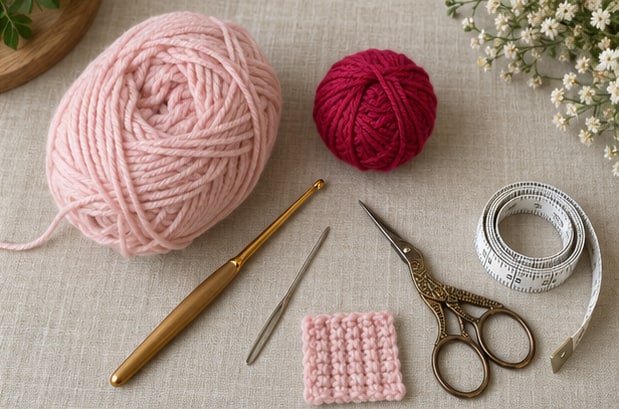
Choose band yarn that feels pleasant against the forehead and behind the ears. A yarn can look soft in a ball but feel scratchy after several minutes of wear, so hold your washed swatch against your skin before committing. Pick a smooth, light color for your first band because both back loops and edge stitches are easier to identify. Check the yarn labels for compatible washing instructions if the hearts use a different fiber. For help comparing fibers and reading yarn labels, see the guide to choosing yarn for beginner crochet; use the weight and gauge specified for this project.
- Soft blush DK yarn, approximately 50–70 yards, with extra available for your swatch.
- A small amount of raspberry fine yarn for three hearts.
- A 4 mm hook for the band and a 2.5 mm hook for the hearts as starting sizes.
- A blunt yarn needle, scissors, two removable stitch markers, and a flexible tape measure.
- Optional sewing clips to hold the seam and decorations while checking placement.
Make a swatch larger than four inches in both directions using the band stitch. Work the first row in regular single crochet and subsequent rows in back-loop single crochet. Wash it as you intend to wash the finished accessory, let it dry flat, and measure without pulling. The target is 20 stitches and 24 rows across four inches. A narrow eight-stitch sample alone is too small to give a reliable four-inch stitch measurement.
More than 20 stitches across four inches means your stitches are smaller; try a larger hook. Fewer stitches means they are larger; try a smaller hook. Row gauge controls band length, so measure the actual strip even when the stitch gauge matches. If the yarn stays stretched after a gentle pull, choose a more resilient yarn rather than making an increasingly tight band to compensate.
Abbreviations and Construction Notes
- Ch: chain.
- Sc: single crochet.
- Dc: double crochet.
- Tr: treble crochet; yarn over twice before inserting the hook.
- Sl st: slip stitch.
- BLO: back loop only, the loop farther from you at the top of the stitch.
- St / sts: stitch / stitches.
The turning chain does not count as a stitch. Work the first single crochet into the first stitch of every row, not into the turning chain. Each band row has eight stitches. Mark the first and last stitch if you tend to lose an edge. Working BLO creates raised ridges across the narrow strip; the strip becomes a continuous loop only after seaming. If you need a refresher on the core stitches used here, review basic crochet stitches for beginners before working through the project-specific counts.
The hearts are separate one-round motifs made into an adjustable ring. Their starting and ending chain-three sections help shape the upper curves but are not included in the tally of 13 tall stitches. There is no second round. Secure the ring tail carefully after shaping, especially if your chosen cotton is smooth and prone to slipping.
Crochet the Narrow Band
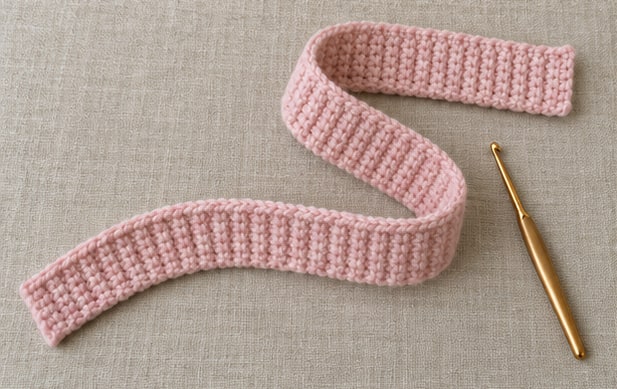
Foundation: Chain 9 loosely enough that the chain edge does not pucker.
Row 1: Sc in the second chain from the hook and in each remaining chain. You have 8 sc. Chain 1 and turn.
Row 2: Sc BLO in each of the 8 stitches across. Chain 1 and turn.
Rows 3–120: Repeat Row 2, maintaining 8 sc per row. After Row 120, do not fasten off until you have checked the length and fit. At the target row gauge, 120 rows make a strip approximately 20 inches long. This is the sample count, not an instruction to ignore your own measurements.
Lay the strip flat periodically with no weight pulling on either end. Check the width near the beginning, middle, and working end. If one section is noticeably narrower, compare stitch counts first, then tension. A misplaced edge stitch is easier to correct while the strip is short than after joining the ends.
For a different width, use the washed stitch gauge to calculate the required count and add one chain for the foundation. At five stitches per inch, a two-inch band needs approximately ten stitches and a starting chain of eleven. Wider bands need more yarn and larger decorations may affect the stretch differently, so swatch any substantial variation.
Check the Fit Before Seaming
Measure around the path where you will wear the headband, not around the widest possible part of your hairstyle. The 20-inch sample has about two inches of negative ease on a 22-inch head. Negative ease simply means the relaxed band is shorter than the wearing measurement; it is useful only when the fabric stretches and recovers comfortably.
Bring the two short ends together around your head without overlapping them, or ask someone to hold them while you check. Do not wear the work with an exposed needle or sharp pin. It should stay in place without producing pressure at the temples. Test with your usual hairstyle and glasses if you wear them. A slippery yarn may shift even when the circumference seems correct.
Add or remove rows before joining. At the target gauge, six rows change the length by roughly one inch, but remeasure rather than assuming your gauge is exact. If the band stretches during the trial and does not spring back, stop and reconsider the yarn. Sewing the hearts onto an already unstable band will not solve the underlying fit problem.
Join the Short Ends Without a Twist
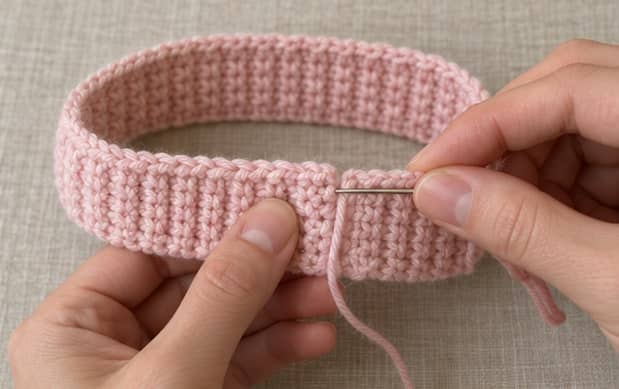
Once the fit is comfortable, fasten off with a sewing tail approximately 12 inches long. Place the short ends together with the strip forming a flat, untwisted loop. Check the entire circumference before sewing: this design has no central twist, crossed section, or knot.
Match the eight stitches at the final row to the eight foundation positions. Use a shallow whipstitch through corresponding edge loops, working one pair at a time. Pull each stitch just enough to close the gap. A tightly cinched seam becomes a hard ridge and can reduce the comfortable circumference.
Secure the tail on the inside and weave it back through several stitches, changing direction to reduce slipping. Check both edges of the join for small holes. Try the undecorated band again with the seam at the back of your head. Correct any tightness now; the finishing should feel unobtrusive before the hearts are added.
Make Three Small Heart Appliques
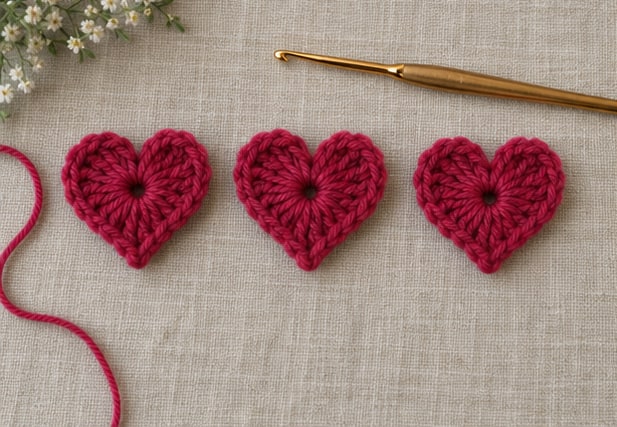
With the fine raspberry yarn and smaller hook, make an adjustable ring. Leave enough starting tail to secure the center later. Work the following sequence into the ring, keeping all stitches accessible until the motif is complete:
Heart round: Ch 3, work 3 tr, then 3 dc; ch 1, work 1 tr for the lower point, ch 1; work 3 dc, then 3 tr; ch 3 and sl st into the ring. Fasten off, leaving approximately 12 inches for attaching the heart.
There are 13 tall stitches: 3 tr plus 3 dc on the first side, 1 tr at the point, then 3 dc plus 3 tr on the second side. The chain sections and closing slip stitch are additional shaping elements, not tall stitches. If the two lobes look different, check the sequence before pulling the ring tightly closed.
Draw the starting tail gradually until the center closes. Arrange the two lobes with your fingers and draw the point downward gently. Weave the ring tail securely through the backs of several stitches in more than one direction. Keep the longer finishing tail available for sewing. Repeat for a total of three hearts, aiming for the same size and firmness.
Each heart should fit within the approximately 1.6-inch band width; roughly 1.25–1.5 inches tall is a useful target. If yours overhangs, use finer yarn or a smaller hook rather than folding the heart edges under. Lightly dampen and shape the motifs if needed, following the fiber care instructions. Let them dry before arranging them on the band.
Sew the Hearts Over One Temple
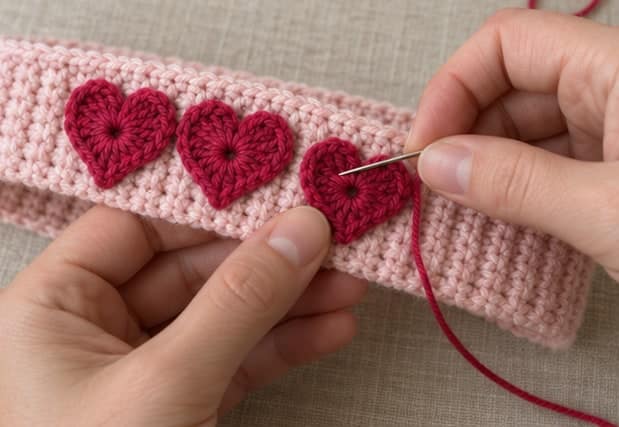
Lay the band relaxed with the back seam opposite the front. Position the hearts in a short row where they will sit above one temple. Leave a small gap between motifs instead of packing them edge to edge. Their points should face the same direction, and no heart should cover the seam. Check the arrangement in a mirror before threading the needle.
Sew each heart separately using its matching tail. Take small stitches through the back of the applique and into the band, securing the lobes, sides, and point. Do not pull the band into gathers. Leave the stitches flexible enough for ordinary wear while ensuring the heart edges do not catch easily on hair or clothing.
Avoid running one long, tight strand behind all three motifs: it can act like a cord and prevent that part of the band from stretching. Finish and weave in each tail locally. After attaching the first heart, test the band again before sewing the other two. If the decorated area feels rigid, loosen and resew the attachment rather than trying to stretch the finished stitches forcibly.
Color and Size Variations
A cream band with burgundy hearts gives a quieter Valentine palette; a denim-blue band with coral hearts works beyond the holiday. Keep the band and motifs visibly different in value so the small hearts remain easy to see. For a subtler version, use just one heart in the same position and leave the rest of the band undecorated.
Adjust circumference through the row count rather than by making a bulky overlap at the seam. Adjust width through the stitch count and foundation chain. Recheck heart size whenever you change the band width. This pattern is written as an adult accessory, not a baby headband; do not add long ties, beads, or other loose embellishments as a shortcut to resizing it. The mini crochet heart is another small motif project to consider when planning a coordinated Valentine gift.
Troubleshooting
The band slips backward
Check the actual wearing path and yarn surface before shortening it. A band positioned too far back on smooth hair may slide regardless of circumference. If the relaxed size is clearly too large and the yarn recovers well, remove a few rows and remake the seam. If it has permanently grown, the yarn may be unsuitable for this construction.
A heart curls away from the fabric
Compare the two sides of the heart and confirm that every stitch was worked into the same ring. Shape the motif gently before attaching it. Secure the point and both lobes, then add a few shallow edge stitches where needed. Do not flatten severe cupping by pulling the band tight underneath it.
The seam feels uncomfortable
A bulky knot or repeated stitches through the same spot can make the join hard. Unpick the seam carefully without cutting the crochet fabric, then join the corresponding edge loops with less tension. Weave the end across several stitches rather than leaving a large knot against the scalp.
Quick Project Plan
| Step | Work | Checkpoint |
|---|---|---|
| 1 | Swatch, choose yarn, and measure the wearing path | Fabric stretches gently and recovers |
| 2 | Crochet the eight-stitch strip and trial-fit it | Sample is about 20 inches, with a comfortable individual fit |
| 3 | Sew the straight seam and make three hearts | No twist; heart motifs fit within the band width |
| 4 | Attach motifs and finish tails | Band still stretches and no edge catches on hair |
Frequently Asked Questions
Can I use cotton for the whole headband?
You can experiment, but ordinary cotton often has less recovery than a springy blend. Make a washed swatch and test repeated gentle stretching first. Do not assume the same two inches of negative ease will work. The fine cotton suggested for the little hearts has a different job from the yarn that holds the band in place.
Do the 120 rows include the first row?
Yes. Row 1 is included in the total of 120 rows. The remaining 119 rows use back-loop single crochet. If you adjust for fit, write down your final total before seaming so you can reproduce the size later.
Should I sew the hearts on while the band is stretched?
Start with the band relaxed, using flexible stitches, and trial-fit after the first motif. Stretching the band aggressively during sewing makes placement hard to judge and can leave loose attachment threads when it relaxes. The undecorated portion should provide most of the necessary movement.
Can this be a tie-back headband instead?
That would require a different finishing method and length calculation. This tutorial uses a closed loop with a straight seam, so the sample row count does not include ties. For this version, adjust rows to fit and retain the simple closed construction.
How should I wash the finished accessory?
Follow the most restrictive care instructions among the two yarns. Support the wet band, reshape it flat, and avoid hanging it by one end. Check that the raspberry yarn is colorfast before combining it with a pale band, especially if the accessory is a gift.
Final Thoughts
The small details make this crochet heart headband work: a comfortable eight-stitch band, a flat back seam, and three motifs sewn without restricting the fabric. Use 120 rows as the gauge-based sample, then let your own fit test decide the final length. Before wearing it, check the heart edges, secure every tail, and make sure the decorated section feels as comfortable as the plain one.
Save your favorite band-and-heart color pairing with Crochet by Season on Pinterest, or share how you adjusted the fit with our Facebook community. A well-fitting narrow band is a useful little accessory long after Valentine's Day.