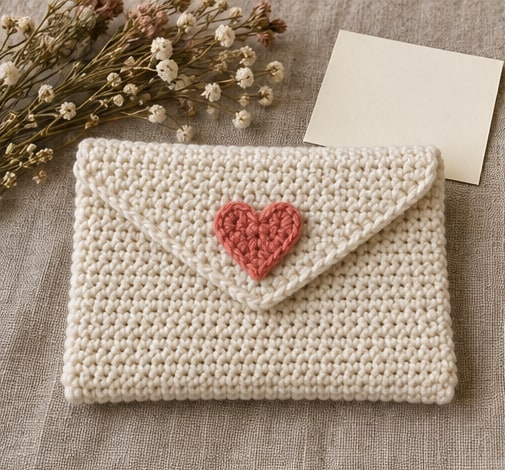
This crochet heart pouch is a small rectangular gift bag with a fold-over flap and a tiny heart sewn onto the front. Its name comes from the decoration, not a heart-shaped opening: the straight-sided pocket is easier to fill with a note, gift card, or a small wrapped present. One long single-crochet rectangle forms the front, back, and flap, so only the two side seams need joining.
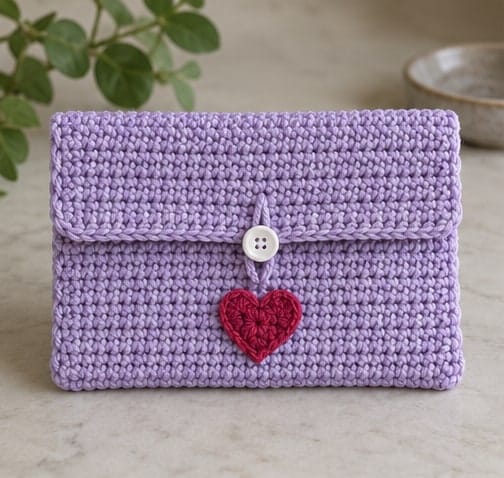
The pattern uses US crochet terms. At the stated gauge, the main rectangle measures approximately 6 by 10 inches. Folding it creates a pouch about 6 inches wide and 4 inches tall, with a 2-inch flap; the usable interior is slightly smaller after seaming. A button and chain loop hold the flap closed. The little raspberry heart is made separately in finer cotton and attached below the closure. Compare this buttoned pocket with a crochet Valentine gift bag before choosing how to present your gift.
Project at a Glance
| Detail | Pattern information |
|---|---|
| Skill level | Confident beginner comfortable with rows and simple sewing |
| Terms | US crochet terminology |
| Construction | One folded rectangle, two side seams, separate heart applique |
| Main yarn | Smooth worsted-weight cotton in lavender |
| Heart yarn | Fine-weight cotton in raspberry or another contrast color |
| Hooks | 4 mm for body and 2.5 mm for heart as starting points |
| Body gauge | 20 sc and 24 rows per 4 inches, washed and relaxed |
| Main rectangle | 30 stitches by 60 rows; approximately 6 by 10 inches |
| Folded dimensions | Approximately 6 by 4 inches with a 2-inch flap |
| Closure | One smooth button and an adjustable chain loop |
| Yarn estimate | 70–100 yards of main yarn plus 5–10 yards for heart and finishing |
| Intended use | Small lightweight gifts, not an unlined coin purse |
Materials and Gauge
Choose a smooth cotton that makes firm, flexible stitches. Lavender and raspberry give the heart a clear contrast without requiring colorwork in the pouch itself. Keep both yarn labels because the fine heart yarn and the body yarn may have different care instructions. Test bright colors for bleeding before sewing them onto a pale background. For help comparing fibers and reading yarn labels, see the guide to choosing yarn for beginner crochet; use the weight and gauge specified for this project.
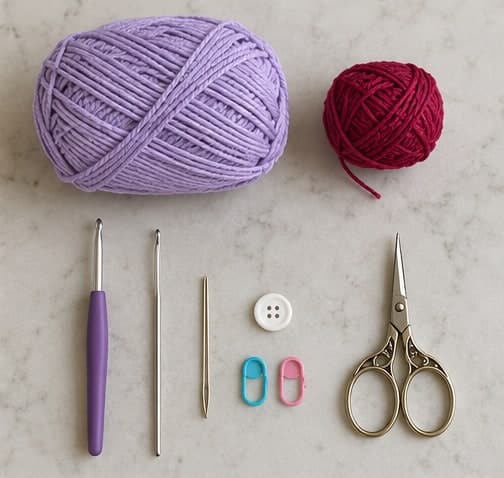
Gather the two hooks, a blunt tapestry needle, scissors, measuring tape, removable markers, and one smooth button approximately ½–⅝ inch across. A smaller sewing needle and strong matching thread may be needed if the cotton does not fit through the button holes. Choose a button without sharp edges that could catch the chain loop.
For the body swatch, chain 27 and work 26 sc across each row, using chain one to turn. Make enough rows to measure a central 4-inch area, then wash and dry according to the label. Aim for 20 sc and 24 rows per 4 inches. Measure without stretching the fabric. If your gauge differs, the same counts will produce a different pouch size.
The heart is decorative, so its exact gauge is less important. Make a sample in fine cotton and aim for a motif about 1½–1¾ inches wide. Check that it fits on the exposed front beneath the folded flap. A thick or oversized heart can crowd the button and make the front less flexible.
Abbreviations and Construction Notes
- Ch: chain.
- Sc: single crochet.
- Dc: double crochet.
- Tr: treble crochet.
- Sl st: slip stitch.
- St / sts: stitch / stitches.
The body's turning chain never counts as a stitch. Work its ordinary stitches through both top loops. The little heart uses taller stitches worked into a central adjustable ring. For dc, yarn over once before inserting the hook, then complete two yarn-over-and-pull-through-two steps. For tr, yarn over twice before inserting the hook, then complete three pull-through-two steps after drawing up a loop. If you need a refresher on the core stitches used here, review basic crochet stitches for beginners before working through the project-specific counts.
The body has three measured sections: 24 rows for the front, 24 rows for the back, and 12 rows for the flap. The fold sits between the front and back sections. Keep the flap free when sewing the sides. The photos illustrate assembly, while the written row counts and your measurements guide the exact fold positions.
Crochet the Main Rectangle
With the main yarn, chain 31. Row 1: Sc in the second chain from the hook and in each remaining chain: 30 sc. Mark the first and last stitch. Keep the foundation relaxed so it does not draw the lower edge tighter than the rest of the fabric.
Row 2: Ch 1, turn. Sc in every stitch across: 30 sc. Do not skip the first stitch or add one into the turning chain at the opposite end.
Rows 3–60: Repeat Row 2. Keep 30 stitches in every row. Place markers at the ends of Row 24 and Row 48 so the front, back, and flap sections remain easy to identify. Fasten off after Row 60, leaving a tail to weave later.
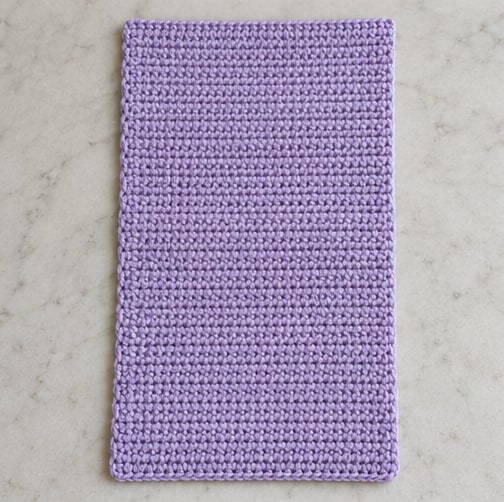
At the target gauge, the rectangle is approximately 6 inches wide and 10 inches long. The first two sections should each measure 4 inches, with 2 inches left for the flap. Wash and dry the piece before assembly if your swatch changed size after washing. Correct a missed row or uneven stitch count before folding; seams cannot make an irregular rectangle square.
Fold the Pocket and Mark the Seams
Lay the rectangle flat with its preferred outer face downward. Fold the first 24 rows upward so the foundation edge meets the Row 48 line. The crease is between Rows 24 and 25. The final 12 rows extend above the pocket as the flap.
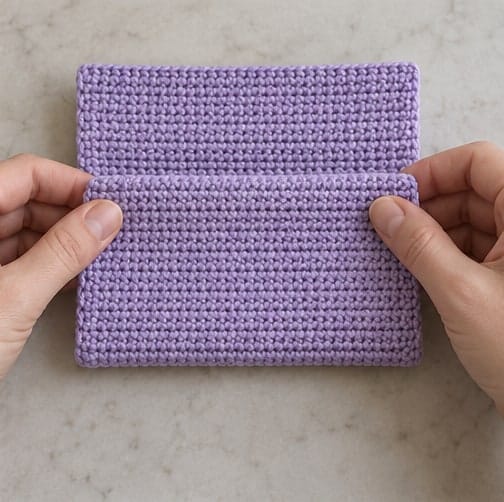
Check both sides with a tape measure. The folded front and back should have the same height, and the flap should remain a single free layer. Clip the top corners of the pocket together, then add markers along the sides to keep corresponding row ends aligned. Do not clip the flap down as if it were part of a side seam.
Place the intended lightweight gift against the pocket opening before sewing. Allow room for the fabric and seams rather than using the outside measurement as the interior capacity. A thick object needs more space than a flat card, and filling the pouch tightly can pull the flap out of alignment.
Sew the Two Side Seams
Thread matching yarn and begin at the bottom fold on one side. Whipstitch the paired front and back row ends together with even, relaxed passes. There are 24 rows on each side of the folded pocket. Match the rows rather than stretching one layer to reach the top.
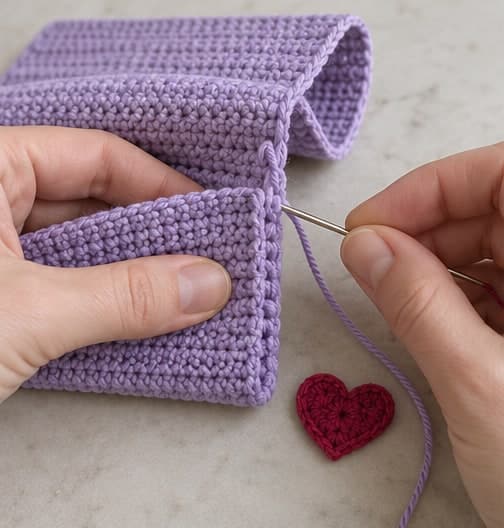
Stop at the pocket's upper edge, where the foundation edge meets Row 48. Secure the yarn and repeat on the other side. Leave the top opening and the flap completely unsewn. The bottom is already closed by the fold and needs no extra seam.
Turn the pouch right side out if you want the seam allowance inside. Gently settle the lower corners without poking through them with a sharp tool. The pouch has a flat folded bottom, not a boxed gusset, so do not expect it to stand upright by itself or hold a bulky load.
Fit the Button and Loop
Fold the flap over the front. Its 2-inch depth covers the upper half of the 4-inch pouch. Find the center of the flap's final edge, between the middle stitches, and join main-color yarn there. Chain 8 as a trial loop, then slip stitch back into the same edge area.
Hold the button temporarily on the front where the loop reaches comfortably. Test the actual button through the loop. Add or remove chains until it closes with mild resistance but does not pull the flap downward or pucker the fabric. Eight chains are a starting count, not a universal button size.
Sew the button securely through several firm stitches of the front layer only. Keep the back of the pouch out of the needle path. Use repeated passes, then secure and weave the thread or yarn ends. Open and close the pouch several times before trimming the loop tails. A small button is a detachable part, so this gift pouch is not intended as a toy for young children.
Crochet the Small Heart
With fine contrast cotton and the smaller hook, make an adjustable ring. Keep it open while working this single shaping round. Chain 3, then work 3 tr and 3 dc into the ring. Chain 1, work 1 tr into the ring for the lower point, and chain 1 again. Work 3 dc and 3 tr into the ring, chain 3, then slip stitch into the ring to finish at the upper notch.
All thirteen tall stitches are worked into the same ring: six tr across the two lobes, six dc along the sides, and one tr at the point. The beginning and ending chain-three sections draw the outline back into the notch. They are shaping chains, not additional tall stitches. Do not turn or work a second layer.
Pull the ring tail gradually until the center closes. Spread the two lobe groups evenly with your fingers and identify the central treble at the lower point. Avoid yanking the tail so hard that it breaks or bunches the stitches into a knot. If the ring will not close, check whether a stitch caught the tail instead of the adjustable loop.
Fasten off, leaving a useful sewing tail. Secure the ring tail through stitch backs in more than one direction so the center will not reopen. Gently shape the heart flat and compare its width with the exposed pouch front. If it is too large, use finer yarn and a suitable smaller hook rather than forcing it beneath the button.
Attach the Heart to the Front
Close the flap and position the heart on the exposed lower front, below the button. Leave a little space around its edges so the motif does not overlap the fold or side seams. Open the flap again and place a hand inside the pouch to separate front and back while sewing.
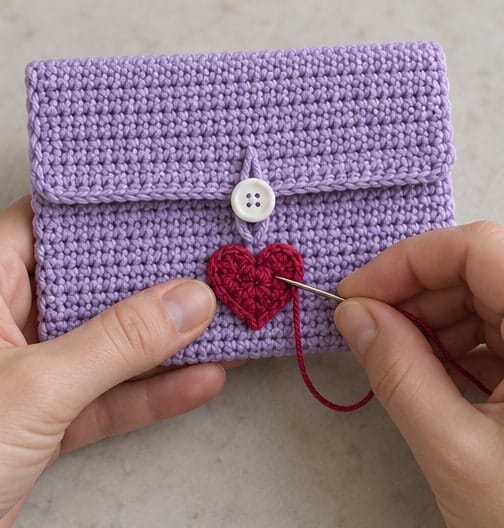
With matching fine yarn, sew small stitches around the heart's edge, catching the front pouch fabric only. Secure both lobes, the notch, and the point so no section hangs loose. Avoid pulling so tightly that the heart cups or the pouch front gathers beneath it.
Check inside afterward to confirm that the pocket has not been sewn shut. Secure the sewing tail through several stitch backs and trim it neatly. The heart is decorative rather than an extra pocket; its full perimeter should be attached.
Pack and Care for the Gift
Test the closure with the intended contents inside. The flap should cover the opening without stretching, and the button should remain centered. This unlined crochet pouch can allow very small objects through its stitch gaps. Put jewelry in a separate secure inner container rather than assuming the crochet alone will retain tiny pieces.
Keep food in its own suitable packaging; the crochet is not food-contact wrapping. Remove contents before cleaning, follow the compatible yarn and button care instructions, and dry completely. Check the heart stitches, seams, and button after washing. For a gift, include a simple note identifying the fibers and care requirements. For a separate small embellishment project, try a mini crochet heart and check its size against the pouch before attaching it.
Troubleshooting
The flap sits diagonally
Check that the rectangle had 30 stitches in every row and that the front was folded evenly to the Row 48 line. Unequal side seams can also pull one corner upward. Correct the fold or seam before moving the button to disguise the problem.
The pocket is accidentally sewn closed
The button or applique stitches may have caught the back layer. Carefully undo only those attachment stitches and repeat with your hand or a protective flat insert inside the empty pouch to separate the layers. Do not cut through the crochet body to free it.
The heart curls away from the fabric
Check its row counts and gently shape it before attachment. If it was flat beforehand, the sewing tension may be uneven. Loosen and resew the affected edge so the motif rests on the fabric without being stretched or cinched.
Quick Project Plan
| Step | What to check |
|---|---|
| Prepare yarn and tools | Swatch the body and check the intended gift size |
| Follow, count, and check | Keep 30 stitches, mark Rows 24 and 48, and fold evenly |
| Finish and review | Sew sides, fit the closure, and attach the heart to the front only |
Frequently Asked Questions
Is the pouch itself heart-shaped?
No. It is a rectangular flap pouch decorated with a small crocheted heart. The straight pocket is intended for lightweight gifts and notes. A shaped heart purse would require different panels and an opening designed for that outline.
Can I use it for loose coins?
Not reliably without a suitable lining and a more secure opening. Small coins or jewelry can pass through gaps, and a buttoned flap is not a sealed closure. This version is intended as reusable wrapping for a small contained gift.
Do I sew across the bottom?
No. The bottom is the fold between the first and second 24-row sections. Sew only the two sides of the pocket, stopping where the flap begins. An extra bottom seam would add bulk without closing anything new.
Can I make the heart with the body yarn?
It will be larger and thicker. Make a sample and check that it fits below the flap without crowding the button. The finer cotton in this version keeps the decoration small and lets the pouch remain flexible.
How can I make the pouch taller?
Add the same measured number of rows to both front and back sections, then decide whether the flap also needs extra depth. Keep notes of the new fold and flap-start rows. Adding rows only to one pocket section will make the opening uneven.
Final Thoughts
The useful checkpoints in this crochet heart pouch are the marked fold lines and the front-only sewing. A 30-stitch rectangle becomes a neat pocket when the two 24-row sections align, while the last 12 rows form the flap. Fit the button loop with the gift inside, then attach the small heart without catching the back layer. Those checks keep the Valentine detail decorative and the pocket usable.
Save lavender-and-raspberry gift ideas on Crochet by Season on Pinterest, or share your finished gift pouch on our Facebook page. Keep the gift dimensions with your row notes so the next pouch can be adjusted deliberately.