A crochet love letter envelope turns a handwritten note into something the recipient can keep. This ivory version uses a plain rectangular pocket and a pointed flap, with a coral heart sewn onto the outside. You crochet the front and back as one strip, continue into the decreasing flap, and close only the two straight side seams. There are no overlapping diagonal panels to align.
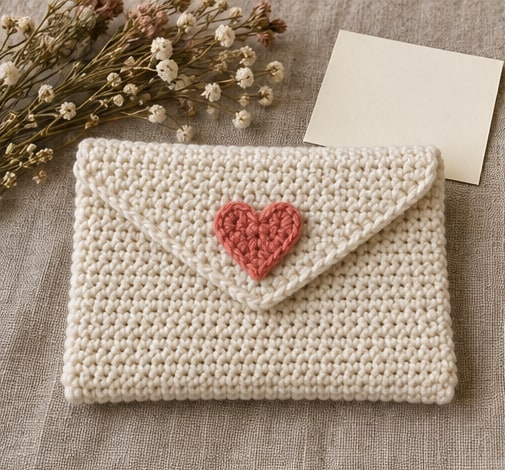
These instructions use US crochet terms. At the target gauge, the finished pouch is approximately 6 inches wide and 4 inches tall, with a flap about 2.7 inches deep. Seam allowances reduce the usable space, so test your folded letter before finishing. A small note around 5 by 3 inches is a sensible starting point. The generated photographs illustrate the construction; follow the written counts and measurements for your own piece. For a gift that needs more space than a flat note pocket, consider a crochet Valentine gift bag.
Project at a Glance
| Detail | Specification |
|---|---|
| Skill level | Confident beginner |
| Construction | One rectangle continued into a triangular flap, then folded and seamed |
| Terms | US crochet terms |
| Main yarn | Smooth DK cotton in ivory |
| Main hook | Start with 3.5 mm and adjust to gauge |
| Main stitch | Single crochet through both top loops |
| Gauge | 20 sc and 24 rows per 4 inches, washed and relaxed |
| Body rectangle | 30 sc across, 48 rows; approximately 6 by 8 inches |
| Flap | 16 rows, tapering from 30 stitches to 1 |
| Finished pocket | Approximately 6 by 4 inches before allowing for seams |
| Approximate yarn | 80–110 yards ivory, plus 5–10 yards coral including practice |
| Closure | Optional small sew-on snap beneath the flap |
| Decoration | One separately crocheted coral heart |
Materials and Gauge
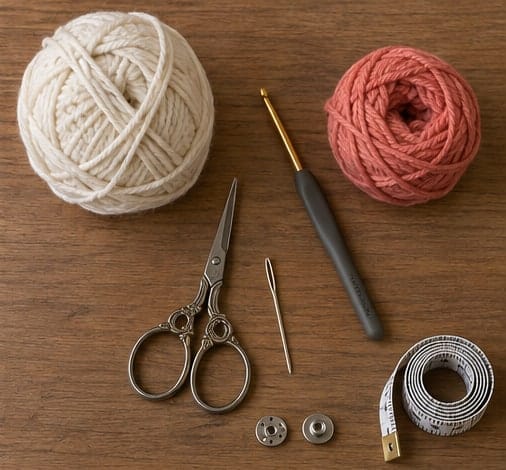
Use smooth cotton with clearly defined stitches rather than a fuzzy yarn that might catch the edges of the paper. The fabric should bend easily but have small enough gaps to keep a folded note inside. If your yarn produces a loose mesh at the target measurements, choose a smaller hook and recalculate the stitch count; do not sacrifice a useful fabric just to match the sample numbers. For help comparing fibers and reading yarn labels, see the guide to choosing yarn for beginner crochet; use the weight and gauge specified for this project.
- DK cotton in ivory for the body and flap.
- A small amount of coral cotton, DK or slightly finer, for the heart.
- A 3.5 mm crochet hook, plus another size if the gauge requires it.
- A blunt yarn needle, scissors, tape measure, and two removable stitch markers.
- Optional small sew-on snap, sewing needle, and matching thread.
- A sample note or card to check the usable inside dimensions.
- Optional lightweight woven cotton for a simple lining.
Swatch in regular single crochet through both loops. Make the swatch larger than four inches square, wash according to the yarn label, and let it dry flat. Count stitches and rows across the central four inches, without stretching. The target is five stitches and six rows per inch. This gives a 30-stitch width of six inches and a 48-row length of eight inches.
If you have more stitches per inch, the pouch will be narrower at the same count. Fewer stitches make it wider. Row gauge affects both pocket depth and flap reach. Compare the swatch with your note and leave room for the thickness of the paper and the side seams. A card that only just fits across the unseamed fabric will probably be too tight after assembly.
Abbreviations and Notes
- Ch: chain.
- Sc: single crochet.
- Sc2tog: single crochet two stitches together, reducing two stitches to one.
- Dc: double crochet.
- Tr: treble crochet, beginning with two yarn overs.
- Sl st: slip stitch.
- St / sts: stitch / stitches.
For sc2tog, insert the hook into the next stitch, yarn over and draw up a loop. Repeat in the following stitch. Yarn over and draw through all three loops on the hook. Each decrease uses two old stitches and produces one new stitch. Use ordinary sc2tog here so the shaping can be worked consistently at both edges. If you need a refresher on the core stitches used here, review basic crochet stitches for beginners before working through the project-specific counts.
The chain-one turning chain never counts as a stitch. The body has 30 stitches in every row. Work the first stitch of each row into the first real stitch and do not crochet into the turning chain at the opposite edge. Mark the first and last stitches if you have difficulty recognizing them in pale yarn.
The lower half of the body rectangle becomes the front; the upper half becomes the back. The triangular flap continues from the back's top edge. The midpoint fold is between body Rows 24 and 25. Keep body-row numbers separate from flap-row numbers so the decreases are easy to track.
Crochet the Body Rectangle
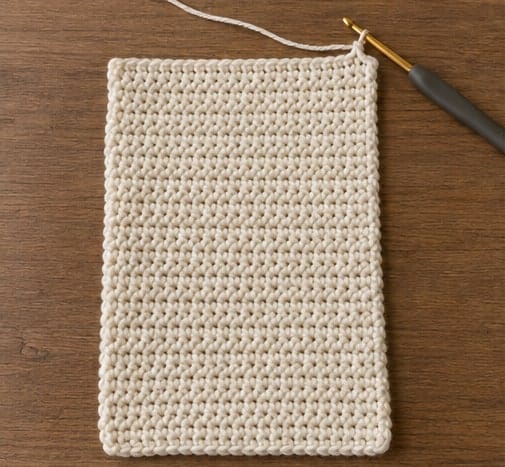
Foundation: Chain 31. Keep the chain relaxed and even rather than pulling it tight around the hook.
Body Row 1: Sc in the second chain from the hook and in each chain across. You have 30 sc. Chain 1 and turn.
Body Rows 2–48: Sc through both loops of each stitch across, maintaining 30 sc. Chain 1 and turn after each row, including Row 48 because the flap follows immediately. Do not fasten off.
After Row 24, put a removable marker into each side edge to identify the future fold. Do not work extra stitches into these marked rows. After Row 48, place the fabric flat and measure it: the sample target is six inches across and eight inches long. The edges should be straight, and the first and last rows should have the same width.
If the rectangle leans sideways, recount several rows and check whether the turning chain has accidentally become a stitch. If the width changes but the count is correct, your tension may have shifted. Correct a noticeable change before shaping the flap; the triangular section will not hide an uneven body.
For a taller pocket, add body rows in pairs so the front and back remain equal. For example, adding six rows to each half makes the body 60 rows long and the pocket about five inches deep at the stated gauge. Move the midpoint markers accordingly. Keep the written sample at 48 rows unless you deliberately choose this adjustment.
Shape the Triangular Flap
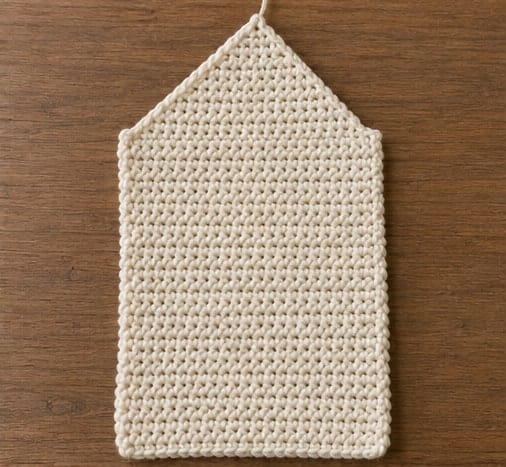
Flap Row 1: Sc in all 30 stitches. Chain 1 and turn. This establishes a plain transition row above the rectangular back.
Flap Row 2: Sc2tog over the first two stitches, sc in the next 26 stitches, sc2tog over the final two stitches. You have 28 stitches. Chain 1 and turn.
Flap Rows 3–15: Begin each row with sc2tog, sc across until only two stitches remain, and sc2tog over those last two. Chain 1 and turn. Each row loses two stitches. Row 15 finishes with two stitches; it consists of two sc2tog decreases and no single stitches between them.
Flap Row 16: Sc2tog over the remaining two stitches. One stitch remains. Fasten off and weave the tail into the back of the flap without pulling the tip into a curl.
| Flap row | Stitches after completing the row |
|---|---|
| 1 | 30 |
| 2 | 28 |
| 3 | 26 |
| 4 | 24 |
| 5 | 22 |
| 6 | 20 |
| 7 | 18 |
| 8 | 16 |
| 9 | 14 |
| 10 | 12 |
| 11 | 10 |
| 12 | 8 |
| 13 | 6 |
| 14 | 4 |
| 15 | 2 |
| 16 | 1 |
At six rows per inch, the 16-row flap is approximately 2.7 inches deep. The final point should sit near the center of the front when closed, not reach the bottom edge. Gently smooth the triangle and compare its two slopes. A small stair-step texture from the decreases is normal; a missing decrease produces a noticeably uneven side.
Fold and Seam the Pocket
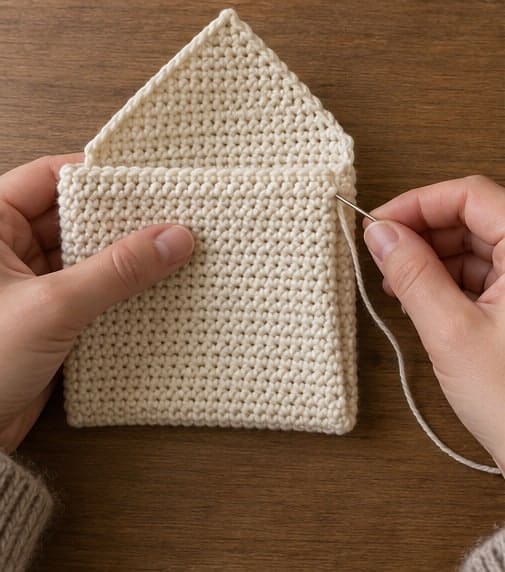
Lay the piece with the side you want inside facing upward and the flap at the top. Bring the foundation edge up toward the base of the flap, folding at the marked midpoint between body Rows 24 and 25. The lower 24-row panel becomes the front, and the upper 24-row panel becomes the back. The triangle remains above the opening.
Align both side edges and hold them with clips or removable markers. The front's top edge should meet the top of the rectangular back, below the flap transition row. Slip your sample note inside now. Check that it can slide in without bending sharply, and that the top edge remains below the fold of the flap.
With matching ivory yarn, whipstitch one side from the bottom fold to the pocket opening, matching the 24 front row ends with the 24 back row ends. Take shallow, consistent stitches so the seam does not consume excessive width. Stop at the opening; do not stitch the flap to the front. Repeat on the other side with a separate length of yarn.
Secure the ends inside, weave through several stitches, and change direction before trimming. Leave the pouch with these neat external edge seams rather than turning it through and making bulky corners. Check both lower corners for holes large enough to catch a paper edge. Close a small gap with one extra sewing stitch if necessary, without bunching the fold.
Add the Heart and Optional Closure
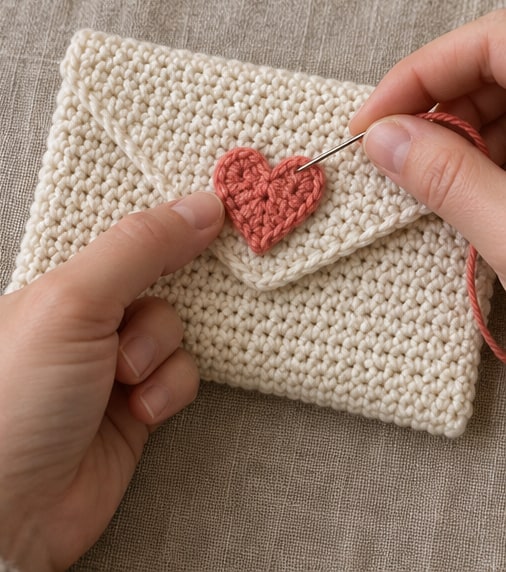
Make an adjustable ring with coral yarn. Into that ring, work: ch 3, 3 tr, 3 dc, ch 1, 1 tr, ch 1, 3 dc, 3 tr, ch 3, then sl st into the ring. Fasten off with a long sewing tail. Close the ring gradually and secure the starting tail through the backs of several stitches. The motif has 13 tall stitches, with chain sections shaping the lobes and lower point.
Arrange the heart on the outside of the closed flap, with its point directed toward the flap tip. Leave enough room around it that the heart does not hang beyond the triangle. If it is too large, use a finer yarn or smaller hook for the motif. Sew through the heart and flap only; put a hand or a piece of card inside the pouch so you do not accidentally catch the front panel underneath.
For a closure, use a small sew-on snap concealed beneath the flap. Mark its position with the pouch holding a typical note so the closure is not placed under tension. Sew one half to the underside of the flap and the matching half to the front panel. Catch several fabric strands with small thread stitches rather than relying on a single yarn loop. Keep stitches discreet on the outside and check that the snap releases without distorting the crochet.
The snap is optional: a flap that lies neatly can simply tuck closed for a lightly handled keepsake. This is an adult gift accessory, not a toy. Avoid loose hardware if it will be accessible to young children, and inspect any closure periodically. Do not describe the pouch as secure storage for valuables; its purpose is to hold a note or lightweight keepsake.
Optional Lining and Personal Details
A thin woven-cotton lining can prevent paper corners from catching in the crochet. Make a small fabric pocket that fits inside the completed pouch with a little ease, turn its top edge under, and hand-sew that folded edge just below the crochet opening. Check the fit before sewing it in; a lining cut to the outside dimensions can bunch inside the seams.
Keep the lining away from the flap hinge and snap so both remain accessible. Do not attach it while stretching the crochet fabric. If the lining is not prewashed, follow its fabric-care guidance before construction to reduce the chance of later shrinkage. A washable pouch does not protect paper from moisture: always remove the note before cleaning.
Try navy with a pale pink heart for a less traditional palette, or a cream envelope with a deep red motif for a classic Valentine gift. Embroider a small initial on the front before adding the lining, making sure the stitching does not close the pocket. Avoid elaborate decorations that make a simple note holder too stiff to open. A crochet heart keychain makes a separate keepsake to give alongside the finished letter pouch.
Troubleshooting
The triangular flap pulls to one side
Compare the row counts against the flap table. Each of Rows 2–15 must begin and end with a decrease. A forgotten decrease cannot be corrected by tugging the finished triangle into place; undo to the affected row and restore the symmetrical count.
The note fits before sewing but not afterward
The side seams take up space, and paper needs clearance to slide. Try a smaller folded note first. If you need the original card size, remake the body wider using your stitch gauge, then recalculate the flap decreases rather than forcing the card into an undersized pocket.
The top opening ripples
Check that the front and back contain the same number of body rows and that the side seams stop at equal heights. Tight seams can pull the opening out of shape. Ease or redo the affected seam instead of adding a tight border around the opening.
Quick Project Plan
| Step | Work | Check before continuing |
|---|---|---|
| 1 | Swatch and choose a note size | Allow space for side seams and paper thickness |
| 2 | Make the 30-stitch, 48-row rectangle | Mark the midpoint and check both edges |
| 3 | Work the 16-row pointed flap | Count down from 30 stitches to 1 |
| 4 | Fold, seam, decorate, and add an optional snap | Note slides freely and flap closes without pulling |
Frequently Asked Questions
Can I put a full-size greeting card inside?
Only if its dimensions fit the actual finished pocket. The sample is intended for a small note; six inches is the outside width, not guaranteed usable space. Measure the card first and make a gauge-based adjustment before starting if you need a larger holder.
Is the heart the fastening?
No. The heart is sewn flat as decoration. The optional snap beneath the flap provides the fastening. Do not leave the heart partially loose as an improvised button because that changes its attachment and may let it catch on other objects.
Why are there no diagonal seams on the front?
This construction borrows the outline of an envelope while using a simple folded crochet rectangle. Its straight side seams are easier to align and leave a smooth front for a note or initial. It is not folded from a square like a paper envelope.
Can I use the same hook for the heart and body?
Yes, if the resulting heart fits comfortably on the flap. The motif size depends on yarn thickness and tension, so make one and check its placement. A smaller hook or finer yarn is useful when the heart would cover the flap edges.
Can I mail the crocheted envelope by itself?
Use it as an inner keepsake holder, not as postal packaging. Put it inside suitable protective mailing packaging and check the carrier's requirements for your destination. Yarn loops and an exposed closure are not a substitute for an addressed outer envelope.
Final Thoughts
This keepsake pouch is ready when the letter slides in easily, the two side seams sit level, and the pointed flap closes without stretching. The sample's 30-stitch rectangle and 16-row decrease sequence give you a clear starting shape, while the heart and note make the finished gift personal. Tuck the message inside only after every tail and sewing thread has been secured.
Save a color combination for your next handmade note holder with Crochet by Season on Pinterest. If you make a matching pair or add a stitched initial, share your version with Crochet by Season on Facebook.