This Halloween crochet garland combines small seasonal motifs into one easy display. It is a practical way to use ghosts, bats, and pumpkins together on a mantel or window.
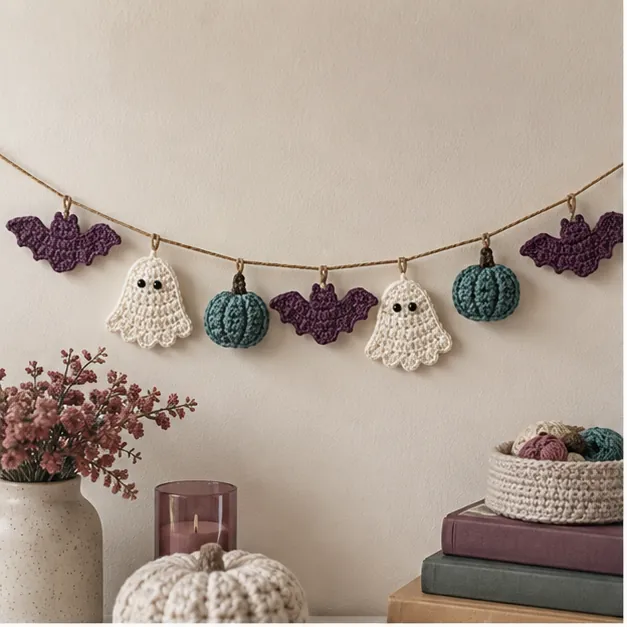
Make the motifs separately, plan the spacing, and attach them to a relaxed foundation chain for a balanced drape.
You can also explore Halloween Crochet.
Project at a Glance
| Skill level | Beginner-friendly |
|---|---|
| Crochet terms | US terms |
| Construction | motifs joined into a display |
| Yarn and hook | Use the weight and hook stated in the pattern directions |
| Main stitch | See the project instructions below |
| Gauge and finished size | Use the stated measurement checks before finishing |
| Finishing | Secure ends, reinforce seams, and add optional lining or reinforcement where useful |
Materials and Gauge
For a useful materials reference, visit Halloween Crochet Patterns: Spooky and Cute Projects.
Gather all yarn, hook, needle, scissors, and optional finishing supplies before you begin. Make a small gauge sample when the project needs a precise fit or a firm fabric. Measure after the sample has relaxed, then adjust hook size before committing to the full project.
Abbreviations and Notes
Ch = chain; sl st = slip stitch; sc = single crochet; hdc = half double crochet; dc = double crochet; inc = two stitches in one stitch; dec or sc2tog = decrease; st/sts = stitch/stitches. Unless a direction says otherwise, the turning chain does not count as a stitch. Keep a marker in the first stitch of each spiral round and write down completed rows.
Crochet the Main Project
Before continuing, you may also like Crochet Ghost Pattern: Cute Halloween Amigurumi.
Beginner project overview
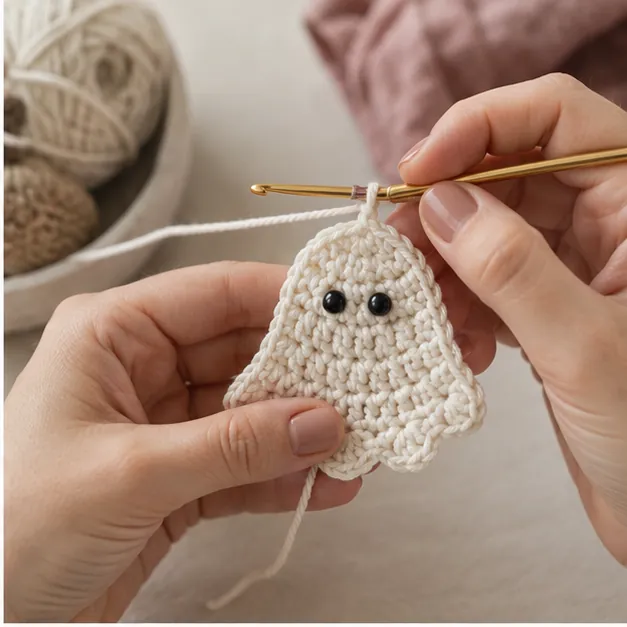
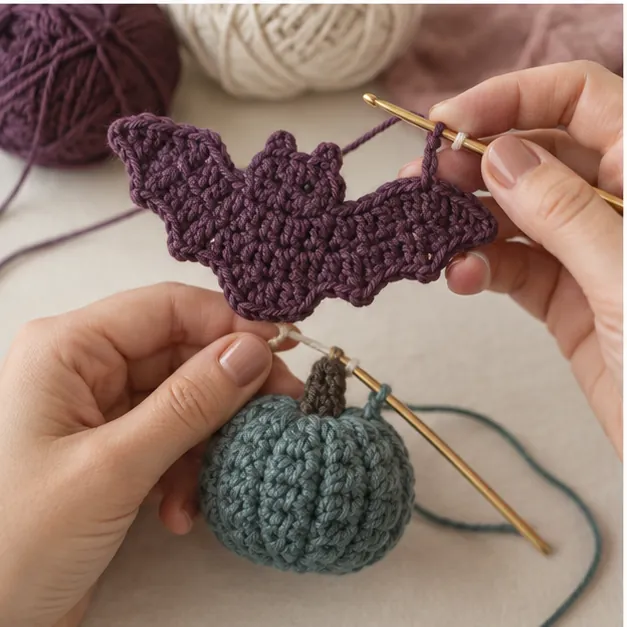
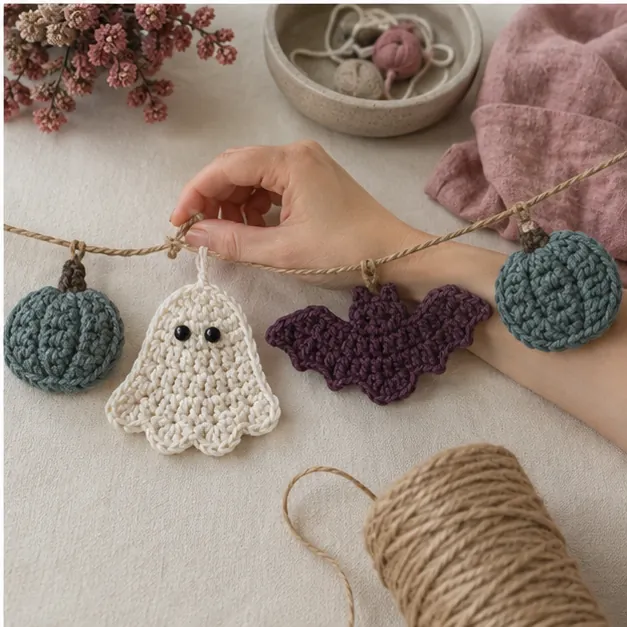
This Halloween garland combines flat ghosts, bats, and pumpkins on one simple chain. Making each motif separately lets you use leftover yarn and adjust the length for a mantel, window, or party table. The pieces are light enough to hang from yarn without a dowel.
Materials
White, black, orange, and green worsted yarn; 4 mm hook; yarn needle; scissors; optional black embroidery floss; and 8 to 10 removable stitch markers.
Abbreviations and gauge
US terms are used: ch = chain, sl st = slip stitch, sc = single crochet, hdc = half double crochet, dc = double crochet, inc = two stitches in one stitch, dec = invisible decrease, st = stitch, and rnd = round. Exact gauge is not essential for a small decoration, but keep your stitches compact enough that stuffing does not show. Count stitches after every round and use a removable marker in the first stitch of spiral rounds.
Read this before starting
Make the first sample with the yarn and hook you intend to use. A hook that is one size smaller than the yarn label suggests usually gives a neater amigurumi fabric. For flat work, use the suggested hook and stop after each round to flatten the piece. The turning chain is not a stitch unless the directions specifically say it is. Put completed rounds on a row counter or a scrap of paper; this is easier than trying to count the visible ridges later.
Pattern instructions
Ghost, make 3: With white yarn, make 8 sc in a ring. Rnd 2: inc around (16). Rnds 3-5: sc around. For the wavy hem, *sc, ch 2, sl st in second ch, sc in next st* around. Fasten off. Embroider two small eyes.
Bat, make 3: With black yarn, ch 17. Sc in second ch, hdc in next 2, dc in next 3, ch 3, sl st in third ch from hook, dc in next 3, hdc in next 2, sc in next 2. Turn to work along the opposite side: sc in next 2, hdc in next 2, dc in next 3, ch 3, sl st in third ch, dc in next 3, hdc in next 2, sc in final. Fasten off and pinch the center to define the wings.
Pumpkin, make 3: With orange yarn, make 12 dc in a ring, join, and add 6 sc in green to form a short stem. Make two vertical surface stitches in orange across the circle to suggest pumpkin segments.
Assembly and finishing
Lay motifs in repeating ghost-bat-pumpkin order, leaving 4 inches between them. Make a foundation chain the desired width plus 12 inches for ties; 140 chains suits a 5-foot mantel. Thread the chain through the top of each motif with the needle, then secure each with one small stitch so it cannot slide.
Make the result neat
Weave yarn tails under at least five nearby stitches on the wrong side, change direction once, and trim only after the tail feels secure. When sewing parts together, pin them first and view the project from the front before making permanent stitches. Use the same yarn for seams when possible, taking tiny stitches through the back loops so the join is nearly invisible. A small amount of stuffing at a time is easier to shape than one large wad; add it before the opening becomes too narrow.
Troubleshooting for beginners
If the garland twists, the motifs were threaded from alternating sides. Lay every motif face-up and bring the chain through from back to front before stitching. If bats curl, mist them lightly and pin flat until dry. Do not stretch the foundation chain while hanging or the spaces will become uneven.
Ways to use the finished piece
Repeat the project in two or three coordinating colors for a more intentional seasonal display. It also makes a friendly practice piece for learning even tension, counting, and invisible sewing. Keep notes about the yarn and hook used; if you decide to make a matching set next year, you will be able to reproduce the size. Build the display from the Halloween crochet patterns hub and add the crochet candy corn pattern between motifs.
Care and storage
Spot clean decorations unless the yarn label specifically permits washing. Let them dry flat, reshape with your fingers, and store them in a dry lidded box after the season. Avoid pressing plastic safety eyes or embroidered details beneath heavy items. These simple habits keep the stitches from stretching and prevent pale yarn from picking up color from darker projects.
Plan the spacing before you hang it
Use removable markers to mark the center of the foundation chain and then the two ends. Clip the center motif first, then place motifs outward in matching intervals. This keeps the display balanced even when the chain has an odd number of decorations. For a wider window, insert two extra chains between each motif rather than pulling the chain taut. A gently draped garland shows each figure better than a straight, tight line.
To make the motifs sturdier, block the ghosts and bats before assembling. Wet them lightly, press them into shape on a towel, and leave them flat until fully dry. Avoid steam on acrylic yarn because it can permanently relax the stitches. A tiny dab of fabric glue on the woven-in tail is optional for a wall-only decoration, but sewing ends in securely is the safer choice for anything that will be packed away and used again.
Pack-away tip: Roll the finished garland loosely around a sheet of acid-free tissue paper rather than winding it tightly. This keeps the bat wings flat and makes next season’s setup much faster.
Customize Your Project
For another seasonal idea, explore No-Sew Crochet Ghost: Fast Halloween Amigurumi.
Change colors, edging, or small details only after you have completed one version at the stated gauge. If you substitute yarn, make a new sample because a thicker fiber can change the finished dimensions, drape, and amount of yarn needed. For bags and items that carry weight, add a lining or reinforcement before regular use.
Troubleshooting
The shape or edge is uneven
Stop and recount the previous round or row. Most uneven edges come from a missed increase, an added turning-chain stitch, or inconsistent tension. Correct the last clearly wrong section rather than trying to hide it later.
The finished piece does not match the measurement
Compare your gauge sample with the stated check. A smaller hook makes a firmer, smaller fabric; a larger hook makes a looser, larger one. Keep the stitch counts unchanged unless the pattern specifically gives resizing instructions.
A seam or attachment feels loose
Use matching yarn and short back-and-forth stitches through the crochet fabric. Reinforce high-stress points with a second pass, then weave the tail in securely.
Quick Project Plan
| Step | Action |
|---|---|
| 1 | Prepare yarn, hook, tools, and a gauge sample. |
| 2 | Follow the directions, count regularly, and check measurements. |
| 3 | Finish, reinforce, weave in ends, and review the project. |
Check Before You Finish
Test any hanging loop, strap, seam, or closure with a gentle pull. Lay flat items on a table to confirm they do not curl; lightly stuff three-dimensional pieces to an even shape. Adjust length, placement, or reinforcement before trimming the final yarn tail.
More Crochet Projects and Guides
- Halloween crochet patterns hub
- crochet candy corn pattern
Final Thoughts
This is a satisfying project to make slowly, with enough structure for a confident beginner. Whether you keep the finished halloween crochet garland for your own home or make it as a gift, take a moment to check the size, seams, and woven-in ends before calling it complete. For more Halloween Crochet inspiration and fresh project ideas, follow Crochet by Season on Pinterest and Facebook.