Design and review note: These original written instructions have been reviewed for stitch arithmetic and construction logic, but have not been physically crocheted or sample-tested. Measurements are planning estimates, not verified finished sizes. Existing images are illustrative, not a photographic record of this exact design. Make a sample and check the relevant fit, shape and attachments before use.
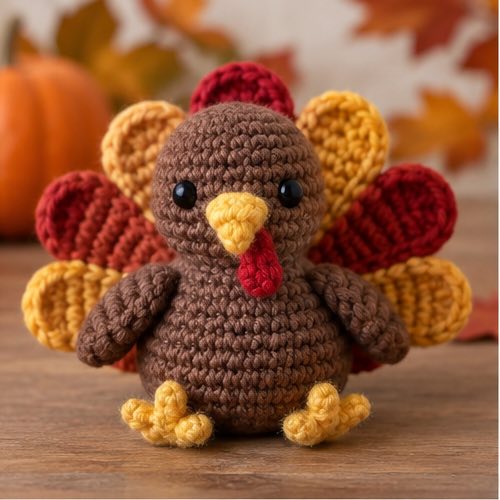
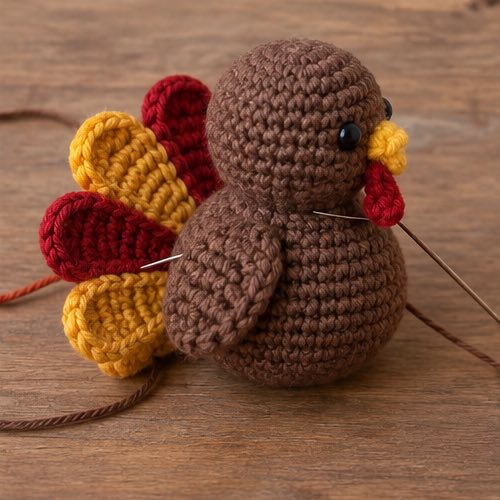
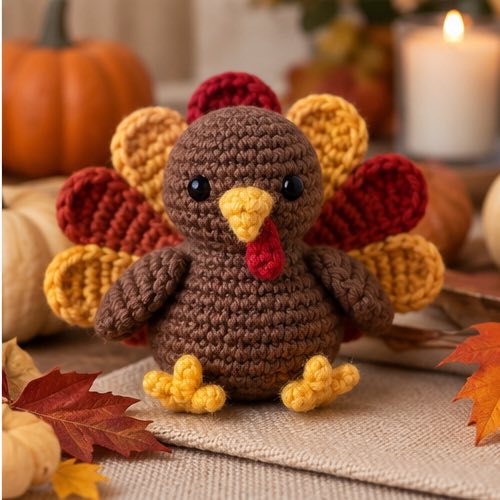
This original decorative turkey has a rounded brown body, a smaller separate head and three flat, two-layer tail feathers. The beak and red wattle are embroidered, avoiding tiny detached face pieces. Work every part before deciding the final feather arrangement.
Pattern status: Stitch counts and the joins described below have been checked on paper. No hand-crocheted sample, measured gauge, yarn usage or finished height is available. The design is unworked and the existing pictures must not be understood as proof that these instructions were tested.
Materials and gauge planning
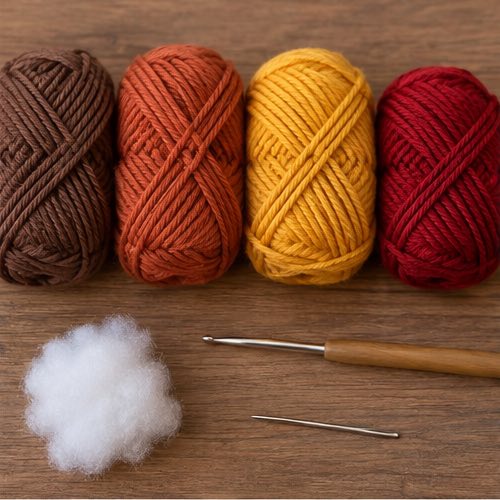
- Smooth worsted cotton or acrylic: brown for body/head, rust/gold/tan for feathers, a little orange, red and dark yarn for embroidery.
- 3.5 mm hook as a starting choice, marker, yarn needle and scissors.
- Polyester stuffing. No wire, pellets, plastic eyes or buttons.
Swatch for dense fabric that does not expose stuffing. Keep the same yarn weight in structural pieces. Exact height depends on your yarn and tension and is not promised. Make and weigh a sample before planning quantities.
US abbreviations
MR = magic ring; ch = chain; sc = single crochet; inc = 2 sc in one stitch; dec = single crochet two stitches together; st = stitch. Unless a row is specified, work continuous rounds without joining. Mark the first stitch. Counts exclude markers, sewing stitches and any fastening slip stitch.
Body
- Round 1: 6 sc in MR. (6)
- Round 2: inc in each stitch. (12)
- Round 3: [sc, inc] 6 times. (18)
- Round 4: [2 sc, inc] 6 times. (24)
- Round 5: [3 sc, inc] 6 times. (30)
- Rounds 6–10: sc in each stitch. (30 each round)
- Round 11: [3 sc, dec] 6 times. (24)
- Round 12: [2 sc, dec] 6 times. (18)
- Round 13: [sc, dec] 6 times. (12)
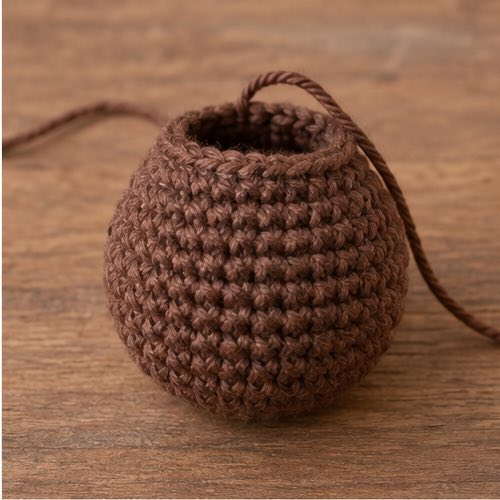
Stuff gradually, shaping the lower body with your fingers rather than hard weights. Round 14: dec 6 times. (6) Fasten off, draw the tail through the front loops of the six remaining stitches, close the opening and bury the tail.
Head
- Round 1: 6 sc in MR. (6)
- Round 2: inc in each stitch. (12)
- Round 3: [sc, inc] 6 times. (18)
- Rounds 4–6: sc in each stitch. (18 each round)
- Round 7: [sc, dec] 6 times. (12)
Fasten off with a long tail and leave the 12-stitch neck opening unclosed. Lightly stuff the head. Embroider two small dark eyes centered on opposite sides of the front face between rounds 4 and 5. Add a small orange triangular beak between them and a short red wattle below it, keeping all loose ends inside.
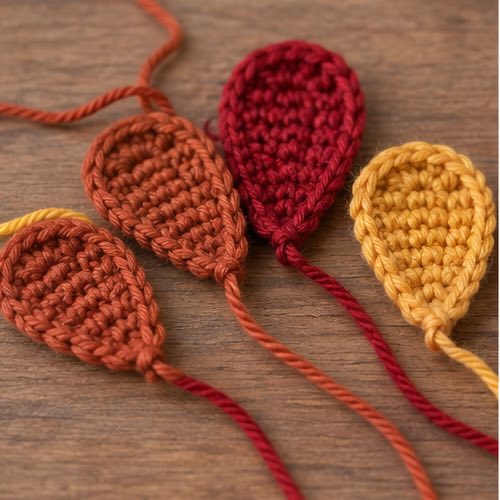
Tail feathers: make six panels for three feathers
Make two panels in each of three colors. Each panel is worked in turned rows; turning ch 1 does not count.
- Ch 3. Row 1: sc in second chain and next chain. (2)
- Row 2: ch 1, turn, inc in both stitches. (4)
- Row 3: ch 1, turn, sc in each stitch. (4)
- Row 4: ch 1, turn, inc, 2 sc, inc. (6)
- Rows 5–8: ch 1, turn, sc in each stitch. (6 each row)
- Row 9: ch 1, turn, dec, 2 sc, dec. (4)
- Row 10: ch 1, turn, dec twice. (2)
- Row 11: ch 1, turn, dec once. (1)
Fasten off. Place matching panels together with the narrow foundation ends aligned. Whipstitch their outer edges together, pairing row ends on both sides and corresponding stitches at top and base. Do not stuff. Each feather has a rounded tapered tip and a narrow attachment end; these are decorative panels, not structural supports.
Optional wings: make two
With brown, ch 6. Row 1: sc from second chain to end. (5) Rows 2–3: ch 1, turn, 5 sc. (5 each row) Row 4: ch 1, turn, dec, sc, dec. (3) Row 5: ch 1, turn, dec, sc. (2) Fasten off with a sewing tail. Weave the starting end into the back.
Assembly
Choose the body front opposite its round-change marker line. Pin the head slightly toward the front of the body's closed top, keeping its face forward. Sew all 12 neck-edge stitches to the body surface in a small oval centered over body rounds 11–13. These are surface joins: do not try to match a 12-stitch head opening to a nonexistent 12-stitch body opening. Add a little head filling before finishing the seam.
Arrange one feather upright at center back and one on either side, fanned outward. Sew each narrow foundation end to the body back across rounds 6–9 with several stitches. Add a second tack higher up each feather, attaching it to the body or its neighbor so the fan does not flop. If using wings, attach their wide foundation ends at the body sides around rounds 7–8, points down. Check that no pin remains.
The turkey is intended to sit in a supported decorative display. It is not guaranteed to stand independently; do not solve balance by adding loose weights.
Troubleshooting
Neck leans: repin before sewing and distribute the 12 attachment stitches evenly. Fan pulls backward: lighten the feather assembly and add support tacks, or place the decoration against a stable display backing. Feather panels differ: check row counts and use the same hook; do not stretch a shorter panel into its partner.
Questions about this turkey
Why are there six feather panels but only three feathers?
Each feather uses two matching flat panels sewn together, which gives the fan more substance without adding stuffing.
Can I omit the wings?
Yes. The head, body and tail construction is independent of the optional surface-sewn wings.
Can I add a hanging loop?
That would require a separate balance and seam-strength check. This draft is for a supported tabletop decoration, not a tested hanging ornament.
Safety and care
Display out of reach of small children and pets. This has not been safety-tested as a toy. Check embroidered details and seams, keep filling inaccessible, and spot clean according to material labels.
Final Thoughts
Take time to pin the head and fan before sewing. Record the result of a physical sample before making claims about finished size or beginner suitability.
More Crochet Projects & Guides
Explore the crochet maple leaf pattern for another autumn motif, then browse the site for simple projects that build confidence one clear step at a time.