This crochet skull is a flat Halloween motif with a rounded head, eye sockets, and a small jaw. It is ideal for banners, patches, and party décor.
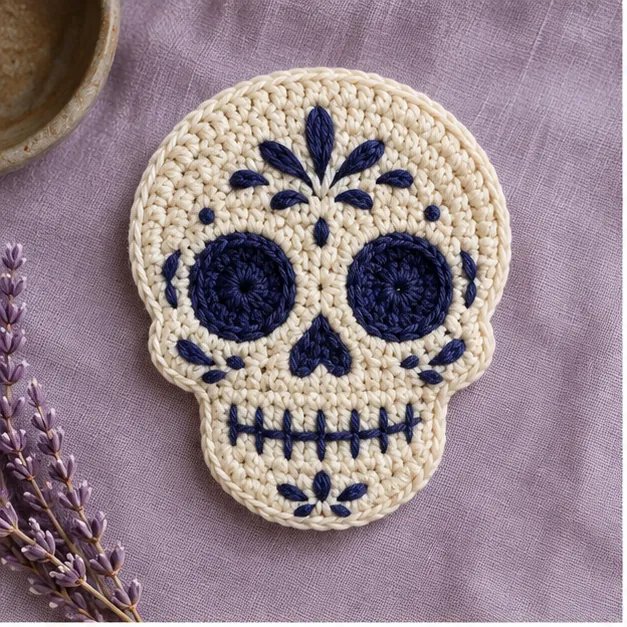
The face is worked in joined rounds, then the features are embroidered or crocheted for a clear finish.
You can also explore Halloween Crochet.
Project at a Glance
| Skill level | Beginner-friendly |
|---|---|
| Crochet terms | US terms |
| Construction | step-by-step crochet construction |
| Yarn and hook | Use the weight and hook stated in the pattern directions |
| Main stitch | See the project instructions below |
| Gauge and finished size | Use the stated measurement checks before finishing |
| Finishing | Secure ends, reinforce seams, and add optional lining or reinforcement where useful |
Materials and Gauge
For a useful materials reference, visit Halloween Crochet Patterns: Spooky and Cute Projects.
Gather all yarn, hook, needle, scissors, and optional finishing supplies before you begin. Make a small gauge sample when the project needs a precise fit or a firm fabric. Measure after the sample has relaxed, then adjust hook size before committing to the full project.
Abbreviations and Notes
Ch = chain; sl st = slip stitch; sc = single crochet; hdc = half double crochet; dc = double crochet; inc = two stitches in one stitch; dec or sc2tog = decrease; st/sts = stitch/stitches. Unless a direction says otherwise, the turning chain does not count as a stitch. Keep a marker in the first stitch of each spiral round and write down completed rows.
Crochet the Main Project
Before continuing, you may also like Crochet Ghost Pattern: Cute Halloween Amigurumi.
A flat skull motif for beginners
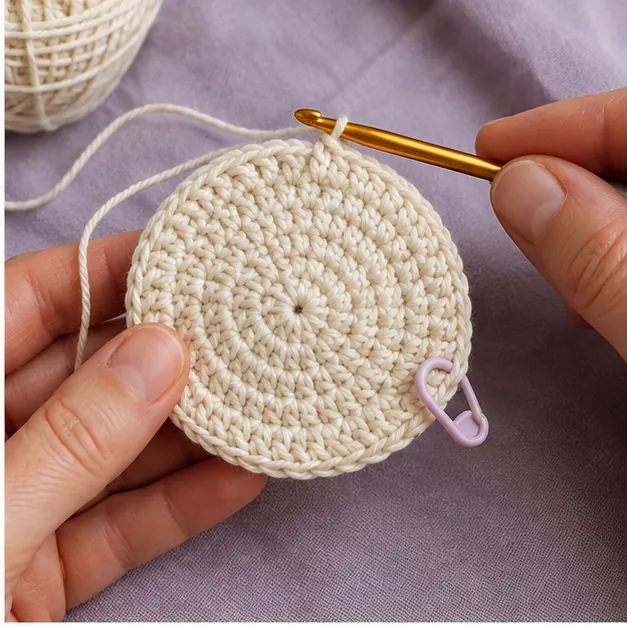
This small crochet skull is a flat applique, so it is quicker than an amigurumi head and easy to sew onto a treat bag, banner, cardigan pocket, or Halloween granny-square project. The shape is made in joined rounds, then two eye sockets and three short teeth are worked directly into the last round. Use smooth worsted-weight cotton or acrylic yarn in bone, cream, or white with a 4 mm hook. Cotton holds the face details crisply; acrylic makes a softer decoration. The finished skull is about 3 1/2 inches wide.
Supplies and abbreviations
You need approximately 20 yards of main-color yarn, a 4 mm hook, yarn needle, scissors, and a small amount of black yarn for the eyes. US terms are used: ch = chain, sl st = slip stitch, sc = single crochet, hdc = half double crochet, dc = double crochet, tr = treble crochet, inc = two stitches in one stitch, and st = stitch.
Before you begin
The starting ring becomes the forehead. Count the top of each stitch, not the chain spaces, as you go around. The beginning chain does not count as a stitch unless the round says otherwise. If your circle cups, loosen your tension or use a hook one size larger; it needs to lie flat before the jaw is added.
Skull pattern
Round 1: With the main color, make a magic ring. Ch 2, work 12 dc into the ring, and join with a sl st to the first dc. You have 12 sts.
Round 2: Ch 2. Work 2 dc in every st around. Join. You have 24 sts.
Round 3: Ch 2. Work *2 dc in the next st, dc in the next st* 12 times. Join. You have 36 sts. At this point, pause and flatten the circle with your palm; it should resemble a shallow disc rather than a bowl.
Round 4, cheek shaping: Sl st in the next st. Ch 1, sc in the next 2 sts, hdc in the next 3 sts, dc in the next 7 sts, hdc in the next 3 sts, sc in the next 2 sts, sl st in the next 2 sts, sc in the next 2 sts, hdc in the next 3 sts, dc in the next 7 sts, hdc in the next 3 sts, sc in the next 2 sts, sl st in the final 2 sts. Join. This varied-height round creates narrower temples and fuller cheeks.
Jaw: Ch 1 and turn your work so the bottom edge faces you. Skip the first 8 stitches of the last round, then sc in each of the next 20 sts. Ch 1, turn. Work sc2tog, sc in the next 16 sts, sc2tog. Ch 1, turn. Sc in each of the 18 sts. Fasten off, leaving a 10-inch tail. The three rows make a rectangular jaw that is slightly narrower at the top.
Add the eye sockets and nose
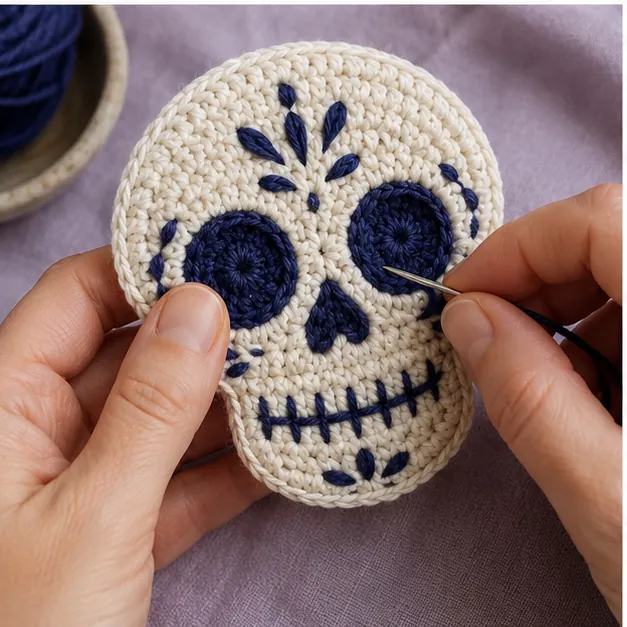
Thread black yarn onto a yarn needle. For the left eye, use three long straight stitches arranged as a small upside-down triangle: one from the upper-left of the socket to the lower point, one from upper-right to the lower point, and one across the top. Fill the middle with two shorter stitches. Repeat on the other side, making sure both eyes sit on the circle, not on the jaw. For the nose, embroider a tiny upside-down V centered one round above the jaw. Do not make the eyes too large; leaving a ring of main color around each one keeps the skull friendly rather than muddy.
Teeth and finishing
With the main-color tail, sew the top of the jaw to the underside of the face at its two outer corners. Use whip stitches through the back loops so the seam stays nearly invisible. With black yarn, make three vertical running stitches from the jaw’s top edge to its bottom edge for teeth. Space them evenly; four stitches can make the mouth look crowded on a motif this size. Weave in all ends on the back.
Make it your own
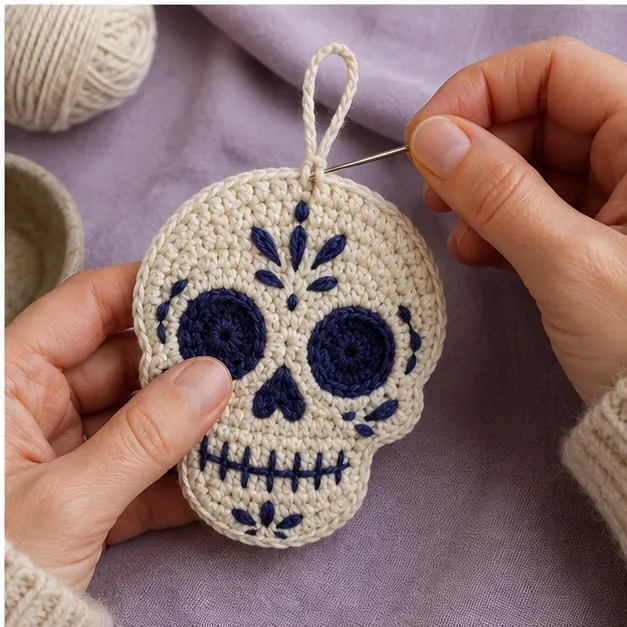
For a larger applique, use bulky yarn and a 5.5 mm hook without changing the stitch counts. To turn the skull into a hanging ornament, add a 12-chain loop to the top center before fastening off. For a sturdier patch, cut a felt backing just smaller than the skull and stitch it to the wrong side. If you are building a coordinated display, pair this motif with the Halloween crochet patterns hub and the earlier crochet black cat pattern.
Troubleshooting
A crooked jaw nearly always comes from beginning it in the wrong place. Fold the face circle in half before starting; place a marker at the bottom center, then count ten stitches on either side of that point for the jaw. If the face ruffles, your Round 3 increases may be too loose, so remake that round with a smaller hook. If the eye embroidery pulls the fabric inward, bring the needle up and down gently rather than tightening each stitch. The finished skull should lie flat, have 36 stitches around the face edge, and show 18 stitches across the final jaw row.
Care
Hand wash only if you used washable yarn and remove any felt backing first. Lay flat to dry and reshape the jaw with your fingers. Store the applique flat between sheets of tissue paper rather than folded, which keeps the eye embroidery smooth for next Halloween.
Where to place the motif
To attach the skull to fabric, pin it in position first and use matching yarn to take small whip stitches through the outer edge every 1/4 inch. On a crochet bag, catch only the front fabric of the bag so the stitches do not show inside. On a wall banner, sew at the temples and jaw corners, then add one center stitch at the top. This prevents the jaw from curling away during display.
Customize Your Project
For another seasonal idea, explore No-Sew Crochet Ghost: Fast Halloween Amigurumi.
Change colors, edging, or small details only after you have completed one version at the stated gauge. If you substitute yarn, make a new sample because a thicker fiber can change the finished dimensions, drape, and amount of yarn needed. For bags and items that carry weight, add a lining or reinforcement before regular use.
Troubleshooting
The shape or edge is uneven
Stop and recount the previous round or row. Most uneven edges come from a missed increase, an added turning-chain stitch, or inconsistent tension. Correct the last clearly wrong section rather than trying to hide it later.
The finished piece does not match the measurement
Compare your gauge sample with the stated check. A smaller hook makes a firmer, smaller fabric; a larger hook makes a looser, larger one. Keep the stitch counts unchanged unless the pattern specifically gives resizing instructions.
A seam or attachment feels loose
Use matching yarn and short back-and-forth stitches through the crochet fabric. Reinforce high-stress points with a second pass, then weave the tail in securely.
Quick Project Plan
| Step | Action |
|---|---|
| 1 | Prepare yarn, hook, tools, and a gauge sample. |
| 2 | Follow the directions, count regularly, and check measurements. |
| 3 | Finish, reinforce, weave in ends, and review the project. |
Check Before You Finish
Test any hanging loop, strap, seam, or closure with a gentle pull. Lay flat items on a table to confirm they do not curl; lightly stuff three-dimensional pieces to an even shape. Adjust length, placement, or reinforcement before trimming the final yarn tail.
More Crochet Projects and Guides
- Halloween crochet patterns hub
- crochet black cat pattern
Final Thoughts
Treat the first version as a useful sample, then make it again in your favorite seasonal colors. Whether you keep the finished crochet skull pattern for your own home or make it as a gift, take a moment to check the size, seams, and woven-in ends before calling it complete. For more Halloween Crochet inspiration and fresh project ideas, follow Crochet by Season on Pinterest and Facebook.