A crochet heart bookmark pairs a tiny flat heart with a slender chain that marks the page. Work the heart in short rows, shape its two upper lobes separately, then attach the cord at the bottom point. Fine cotton keeps the piece light, while a single layer avoids the bulk of a stuffed charm. The heart rests above the pages and the cord sits inside the book.
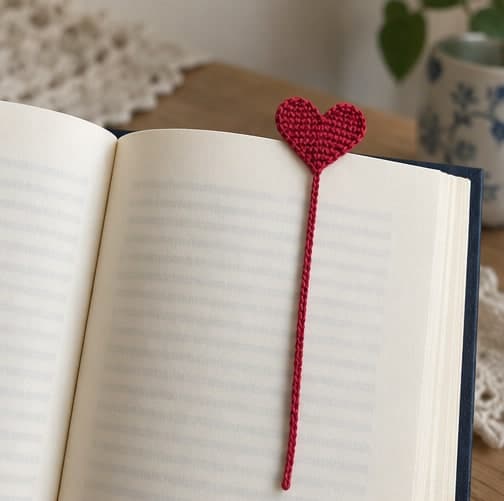
These instructions use US crochet terms. With the suggested yarn and gauge, the heart is approximately 1⅔ inches wide and 1⅖ inches tall. Start with a 60-chain cord and adjust its physical length to the intended book; chain tension varies. This version has no tassel, bead, or thick border, so the finished gift stays simple and easy to fit between ordinary pages. Find other small handmade gift ideas in the Valentine crochet patterns collection.
Project at a Glance
| Detail | Pattern information |
|---|---|
| Skill level | Confident beginner comfortable with small increases and decreases |
| Terms | US crochet terminology |
| Construction | One flat heart with a chain attached at its lower point |
| Yarn | Fine-weight smooth cotton, category 2 as a starting choice |
| Hook | 2.5 mm starting point; adjust for neat small stitches |
| Main stitch | Single crochet through both loops |
| Gauge reference | 24 sc and 28 rows per 4 inches in a flat swatch |
| Heart size | Approximately 1⅔ by 1⅖ inches, depending on yarn and tension |
| Heart count | 10 stitches at the widest row; two 5-stitch lobes |
| Cord | Start with 60 chains, then fit to the book |
| Yarn estimate | 5–10 yards per bookmark, plus any practice swatch |
| Finishing | Thin, secure woven tails; no stuffing or hardware |
Materials and Gauge
Choose smooth cotton that does not shed readily onto paper. A solid raspberry shade makes the small stitch tops easier to see than a dark multicolor yarn. Test strongly dyed yarn for color transfer with a damp white cloth before putting it near a valued book. Let all washed or dampened work dry fully before it touches pages. For help comparing fibers and reading yarn labels, see the guide to choosing yarn for beginner crochet; use the weight and gauge specified for this project.
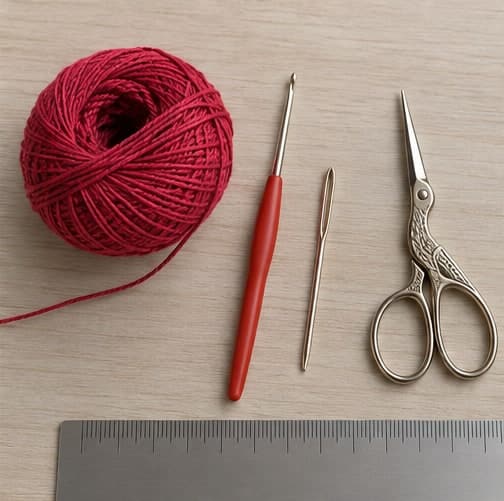
Gather yarn, a small crochet hook, a blunt needle that passes through the stitch backs, scissors, a ruler, and two small removable markers. Have the intended book or one with a similar page height nearby. Do not put sharp pins into a book to hold the bookmark while fitting it.
The gauge reference is 24 stitches and 28 rows in 4 inches. You can make a separate flat swatch if you want a predictable size, or treat the first heart as a sample and measure it. At six stitches per inch, its ten-stitch width is approximately 1⅔ inches. At seven rows per inch, its ten-row height is approximately 1⅖ inches.
Exact gauge is less important than a thin, flat result. If the heart feels bulky, choose finer yarn with a suitable hook rather than pulling thick yarn extremely tight. If the stitches are loose and the shape collapses, try a slightly smaller hook. Record the combination that gives a clean shape before making a gift set.
Abbreviations and Notes
- Ch: chain.
- Sc: single crochet.
- Inc: 2 sc in the same stitch.
- Sc2tog: single crochet two stitches together.
- Sl st: slip stitch.
- St / sts: stitch / stitches.
Chain one before turning each row; that chain never counts as a stitch. Work ordinary stitches through both loops. To make sc2tog, pull up a loop in each of the next two stitches, yarn over, and draw through all three loops. One sc2tog reduces the count by one. If you need a refresher on the core stitches used here, review basic crochet stitches for beginners before working through the project-specific counts.
The heart is worked from the bottom point upward, reaching ten stitches before splitting into two groups of five. Each lobe is worked separately. There is no sewing of two heart halves and no back layer. The photographs illustrate the steps; the written row counts are the reference for checking the small stitches.
Build the Lower Point
Chain 3. Row 1: Sc in the second chain from the hook and in the final chain: 2 sc. Leave a tail long enough to weave securely later, but do not turn it into a bulky knot at the point.
Row 2: Ch 1, turn. Inc in each stitch: 4 sc.
Row 3: Ch 1, turn. Inc in the first stitch, sc in the next 2 stitches, inc in the last stitch: 6 sc.
Row 4: Ch 1, turn. Inc in the first stitch, sc in the next 4 stitches, inc in the last stitch: 8 sc.
Row 5: Ch 1, turn. Inc in the first stitch, sc in the next 6 stitches, inc in the last stitch: 10 sc.
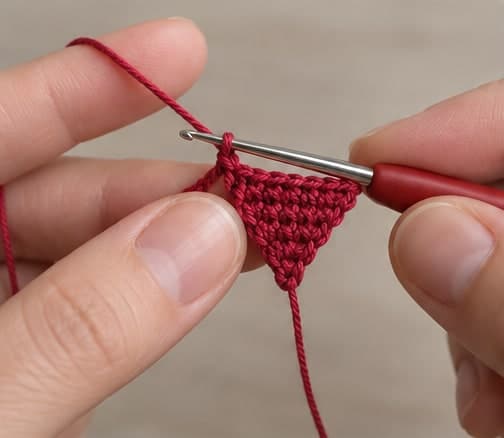
Count at the end of each row rather than trying to count the tiny finished heart later. The two side edges should widen evenly. If one increase lands in the turning chain, the outline can develop an extra bump. Undo to that row and correct it before building the upper section.
Work the Body and First Lobe
Rows 6–7: Ch 1, turn. Sc in each stitch across: 10 sc per row. Mark the division between the fifth and sixth stitches of Row 7. This is where the two lobes separate.
Row 8, first lobe: Ch 1, turn. Sc in the first 5 stitches only: 5 sc. Leave the other 5 stitches of Row 7 unworked. Turn at the midpoint instead of continuing across the full heart.
Row 9: Ch 1, turn. Sc2tog, sc in the next stitch, sc2tog: 3 sc. The two decreases consume four of the five previous stitches, and the middle sc consumes the remaining one.
Row 10: Ch 1, turn. Sc in each of the 3 stitches: 3 sc. Fasten off. This short straight top gives the lobe a small rounded-looking cap after gentle shaping, rather than decreasing it to a sharp peak.
Finish the Second Lobe
Return to the five unworked stitches of Row 7. Join yarn at their outer edge and work toward the center. Ch 1, then sc in each of those five stitches for the second lobe's Row 8. Do not make an extra stitch in the join.
Repeat Row 9 with sc2tog, one sc, and sc2tog for a total of 3. Work Row 10 straight across those 3 stitches, then fasten off. Both lobes should have three rows above Row 7 and the same top width.
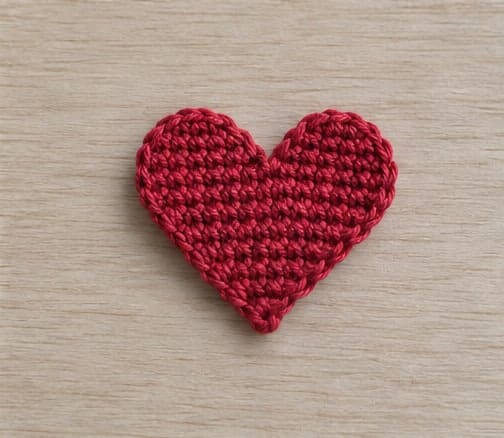
Lay the heart flat and compare the two sides. The notch should be visible between the lobes without a thread pulling across it. Gently arrange the fabric with your fingers. If the shape is strongly uneven, compare row and stitch counts rather than trying to stretch the smaller side until it matches.
Attach the Page-Marking Cord
Join matching yarn securely through sturdy loops at the bottom point of the heart. Make a slip stitch to anchor it, then chain 60 with relaxed, even tension. Keep the chain narrow and flexible; it does not need a return row of stitches.
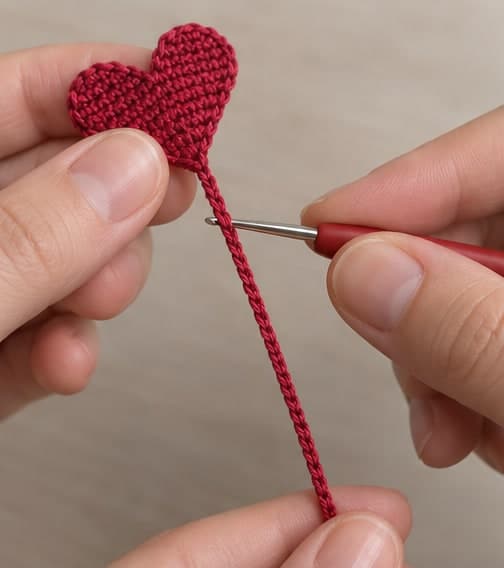
Measure the chain without stretching it. For example, eight chains per inch would make 60 chains about 7½ inches long, but your chain gauge may differ. Lay the heart just above the top of the book's pages and let the cord run down the open page. Add or remove chains until the length suits that book without a large loose tail hanging below it.
Fasten off and secure the end neatly. Use the needle to pass the tail back through several chain links, changing direction where possible without making a thick lump. Trim only after gently tugging the cord to confirm it remains secure. There is no bead or tassel to conceal a poorly fastened end.
Weave the Heart Tails Flat
Work on the back of the heart. Pass each tail through the backs of several stitches, then change direction to help hold it. Avoid drawing the yarn so firmly that the small panel puckers. Keep the tails away from the center notch so the two lobes remain clearly separated.
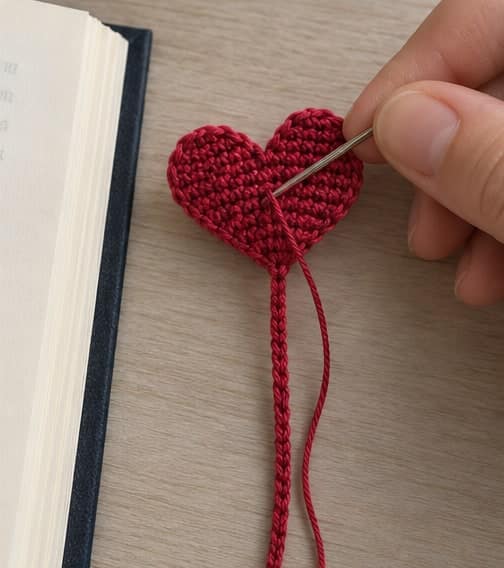
For a small motif, a needle with an oversized eye can stretch the fabric. Use one suited to the fine yarn and guide it through stitch backs rather than forcing it through a single tight loop. Check the front after each tail to ensure no long strand is visible across the surface.
If the yarn's care instructions permit, lightly dampen and shape the heart on a clean flat surface. Arrange the point and lobes gently without stretching them into a different size. Let it dry completely. Do not use glue to stiffen it: this bookmark is intended to remain soft and flexible near paper.
Test It in the Book
Place the heart outside the top page edge and the chain inside. Close the book gently and check that it rests normally. If the bookmark makes a noticeable ridge, use finer yarn or keep less of the motif between the pages. Do not press a valuable binding closed around a bulky crochet piece.
Open the book again and check for snagging, color transfer, or loose fibers. A crocheted bookmark is not the best choice for every volume; use a thin paper bookmark for delicate, rare, or tightly bound books. The gift should make reading convenient rather than force the recipient to work around an awkward accessory.
Personalize the Valentine Gift
Make several hearts in related colors, keeping the yarn thickness consistent. A contrasting cord is possible, but weave the join carefully into the bottom point so the back remains tidy. Avoid adding a second heart layer simply to hide the tails, since that creates unnecessary thickness.
Pair the bookmark with a handwritten note or a book chosen for the recipient. Include the yarn's care instructions and suggest keeping the heart outside the pages. If making several bookmarks, fit the cords to similar-size books instead of assuming the same chain count suits a paperback and a tall hardback equally well. For a matching gift that can travel outside a book, make a crochet heart keychain.
Troubleshooting
The heart looks like a triangle
Check that Rows 6 and 7 were worked straight and that both lobes were completed above them. Skipping the short full-width section or forgetting one lobe reduces the recognizable heart outline. Compare the rows before changing hook size.
The cord twists into a corkscrew
Check whether the chains were pulled tightly or the yarn twisted as you worked. Try a new short chain with relaxed tension, letting the yarn unwind naturally. Gentle damp shaping may help a correctly made cotton chain, but forcing a very tight cord flat will not reliably change its structure.
The small notch closes when I weave in tails
A tail may be crossing from one lobe to the other or being pulled too firmly. Rework that tail within its own lobe, leaving the center division free. The notch should come from the shaping, not from a tight stitch cinching the heart inward.
Quick Project Plan
| Step | What to check |
|---|---|
| Prepare yarn and tools | Choose fine cotton and compare thickness with a book page |
| Follow, count, and check | Widen from 2 to 10 stitches and make two matching lobes |
| Finish and review | Fit the chain length, weave thin tails, and test the closed book |
Frequently Asked Questions
Should the heart sit between the pages?
The intended arrangement keeps the heart just above the page edge, with the thin chain inside. That reduces bulk against the paper. If you prefer an entirely internal bookmark, choose a much flatter option appropriate for the book's binding.
Can I use leftover worsted yarn?
It will make a larger and thicker heart. You can experiment for a gift tag, but it may be unsuitable as a bookmark in a tightly bound book. Fine cotton is the starting material here because keeping the accessory thin is part of the design.
Is the 60-chain cord a fixed size?
No. It is a starting count. Chain tension and the book's page height determine the required length. Measure the chain while relaxed, then adjust before fastening off so the cord fits the intended book.
Can I add a tassel to the bottom?
That would be a different finish from this simple version. A tassel adds loose strands and more length outside the book. Try the plain cord first; it is easier to store, less likely to catch, and keeps the small heart as the main detail.
How should I clean it?
Follow the yarn label, reshape gently, and let it dry completely before using it again. Keep it separate from books while damp. Recheck the cord end and woven tails after washing so no loose strand catches a page.
Final Thoughts
The success of this crochet heart bookmark comes from its small scale: ten stitches at the widest row, two matching five-stitch lobes, and a single thin cord fitted to the book. Take time with the tails so the back stays smooth, then test it in a closed volume before giving it away. The result is a modest Valentine detail that does not need extra hardware or decoration.
Keep small handmade gift ideas on Crochet by Season's Pinterest page, and share your bookmark-and-book pairing on our Facebook page. Note the finished cord length for the next reader instead of relying on chain count alone.